Microkinetics Drive Rack Conversion. Tormach Path Pilot Install! (Non Tormach 12X Lathe)
Microkinitics Drive Rack!

Join The 12X Lathe Facebook Group.
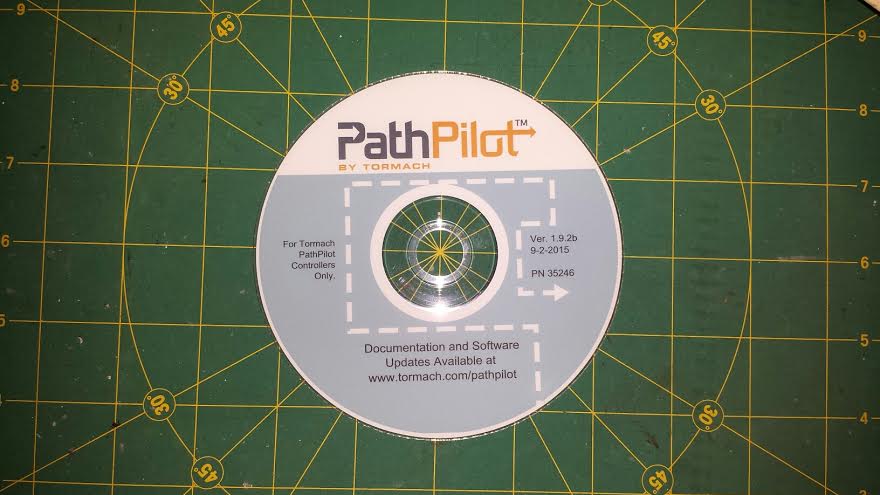
You Will Need to Buy The Media! Buy it Here From Tormach
Please Support Them They Wrote a Nice User Friendly GUI!
“Tormach will not Support it unless you have a Tormach Machine but if you go to linuxcnc.org they have a forum for Path Pilot for help configuring most stuff.”
Yes, Requires a Mesa Card! “you can also configure it to run On LPT but not covering that here” The Best Deal for a MESA Card is the 7I76-5I25 PLUG-N-GO KIT PCI or 7I76-6I25 PLUG-N-GO KIT PCIe

You Can Just Cancel and Reboot when you see Tormach HOLD DOWN Left Alt + Shift will let you in to Linux Desktop. You will do this again when you have your custom INI & HAL Files.
You will also need to change the firmware file for the MESA Card Software if you d0 not will flash the Mesa card with Tormach Firmware File. Files are located in operator/tmc/mesa.
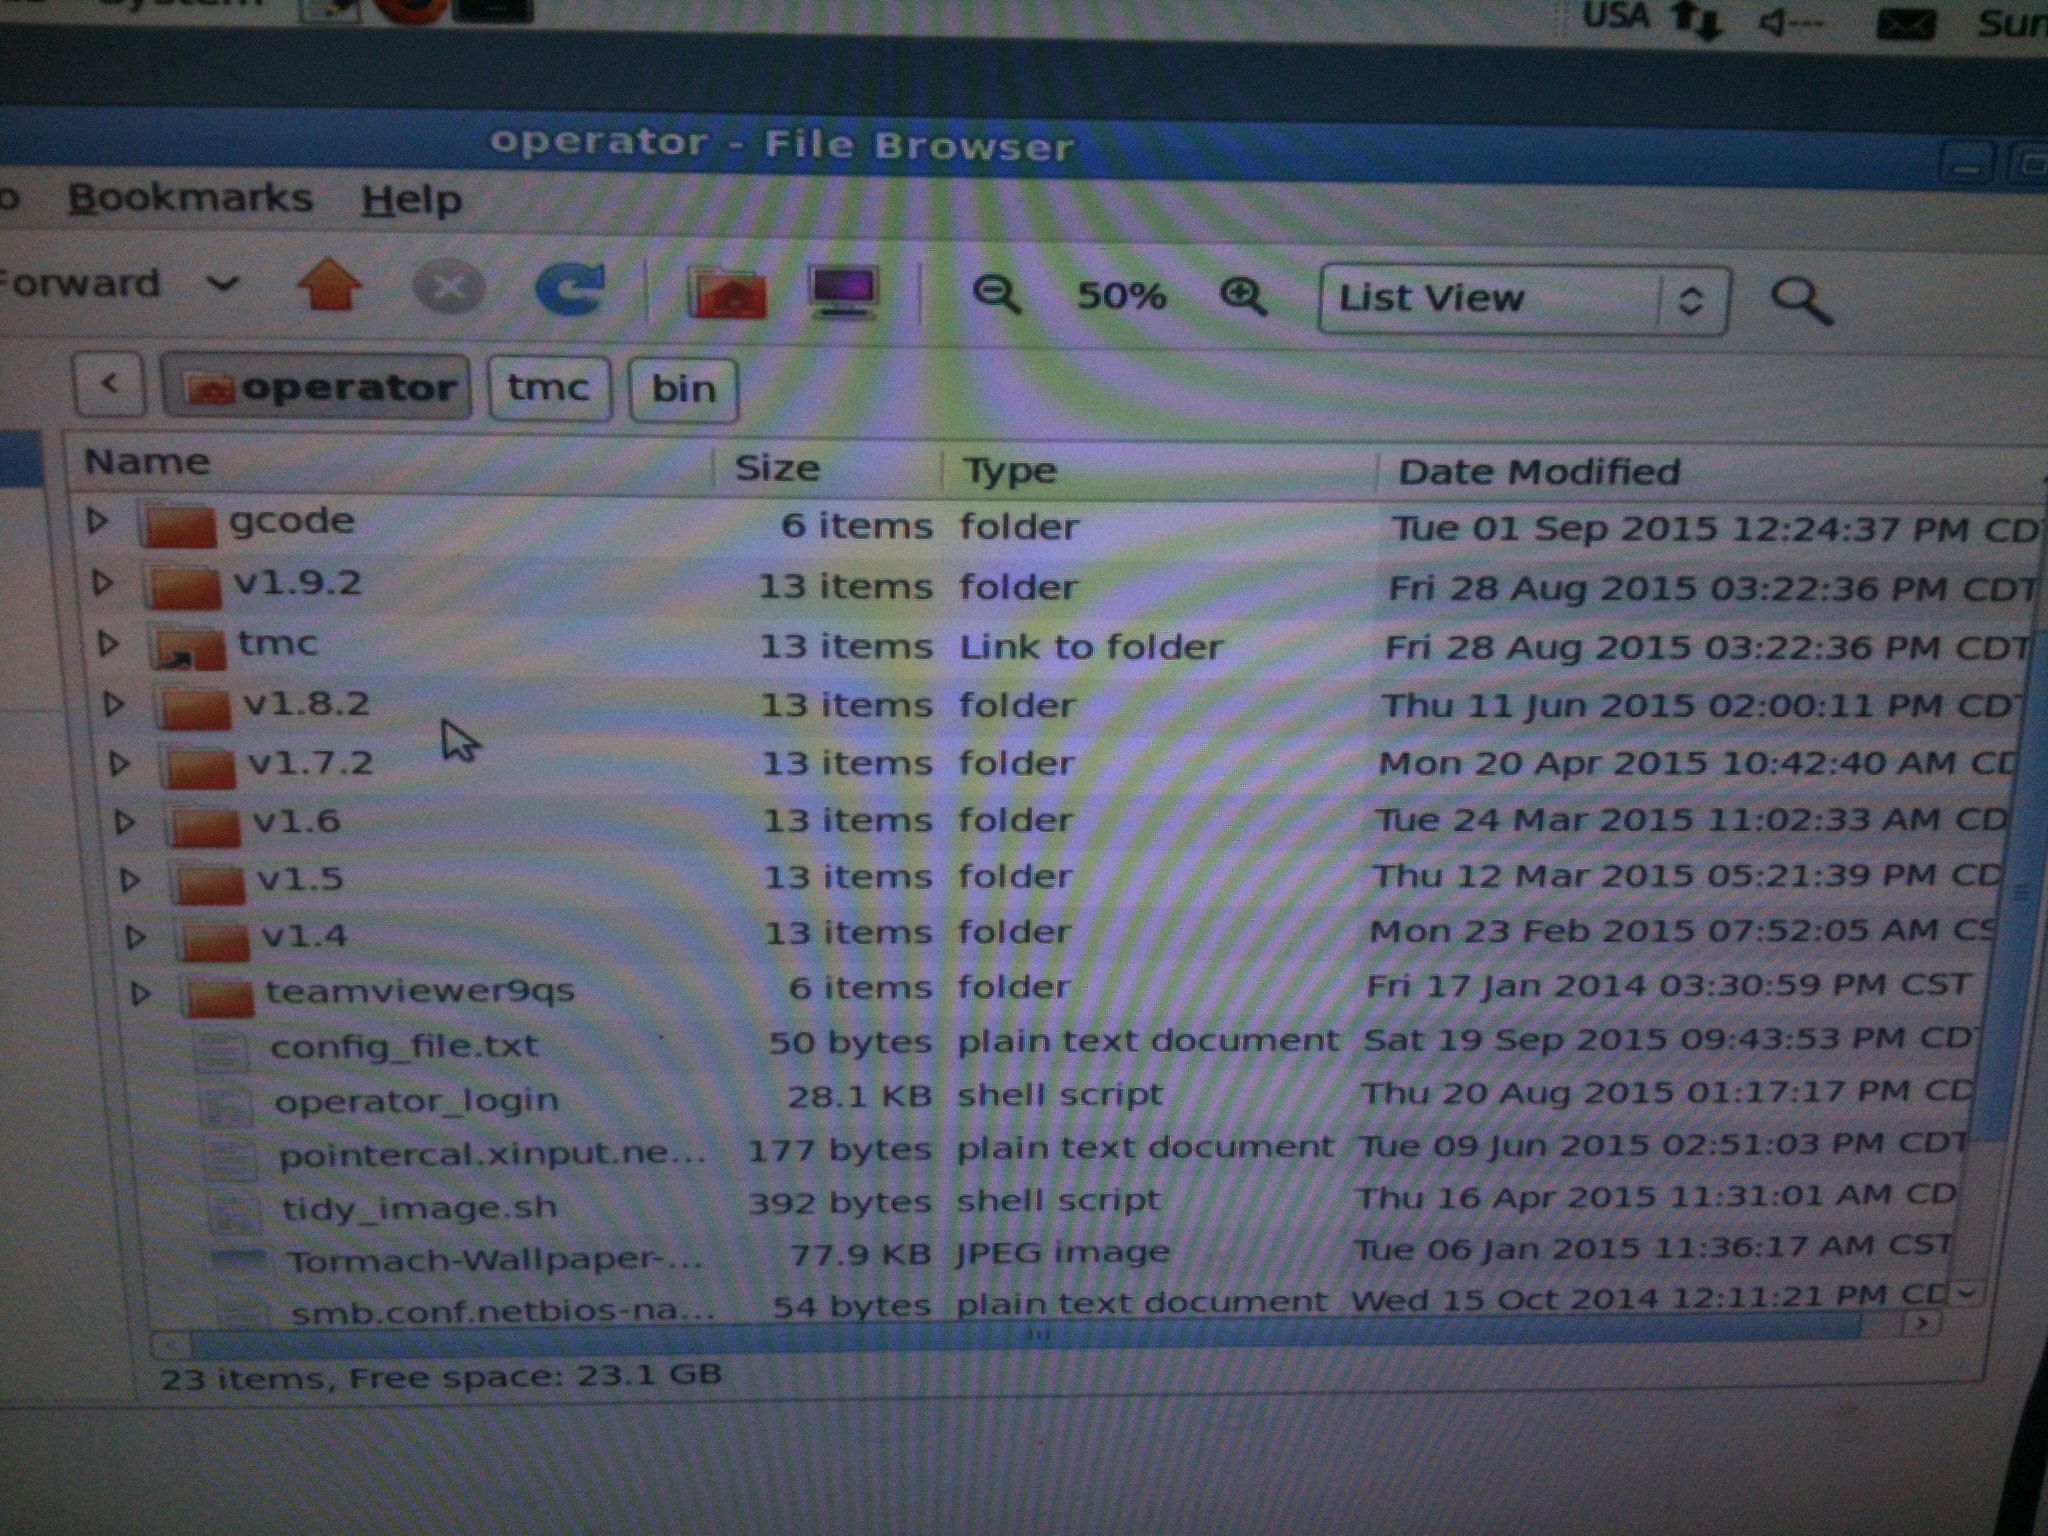
Open Operator dir Change the first line on the config_file.txt
For the Lathe: ~/tmc/configs/tormach_lathe/tormach_lathe_sim.ini
For the Mill: ~/tmc/configs/tormach_mill/tormach_mill_sim.ini
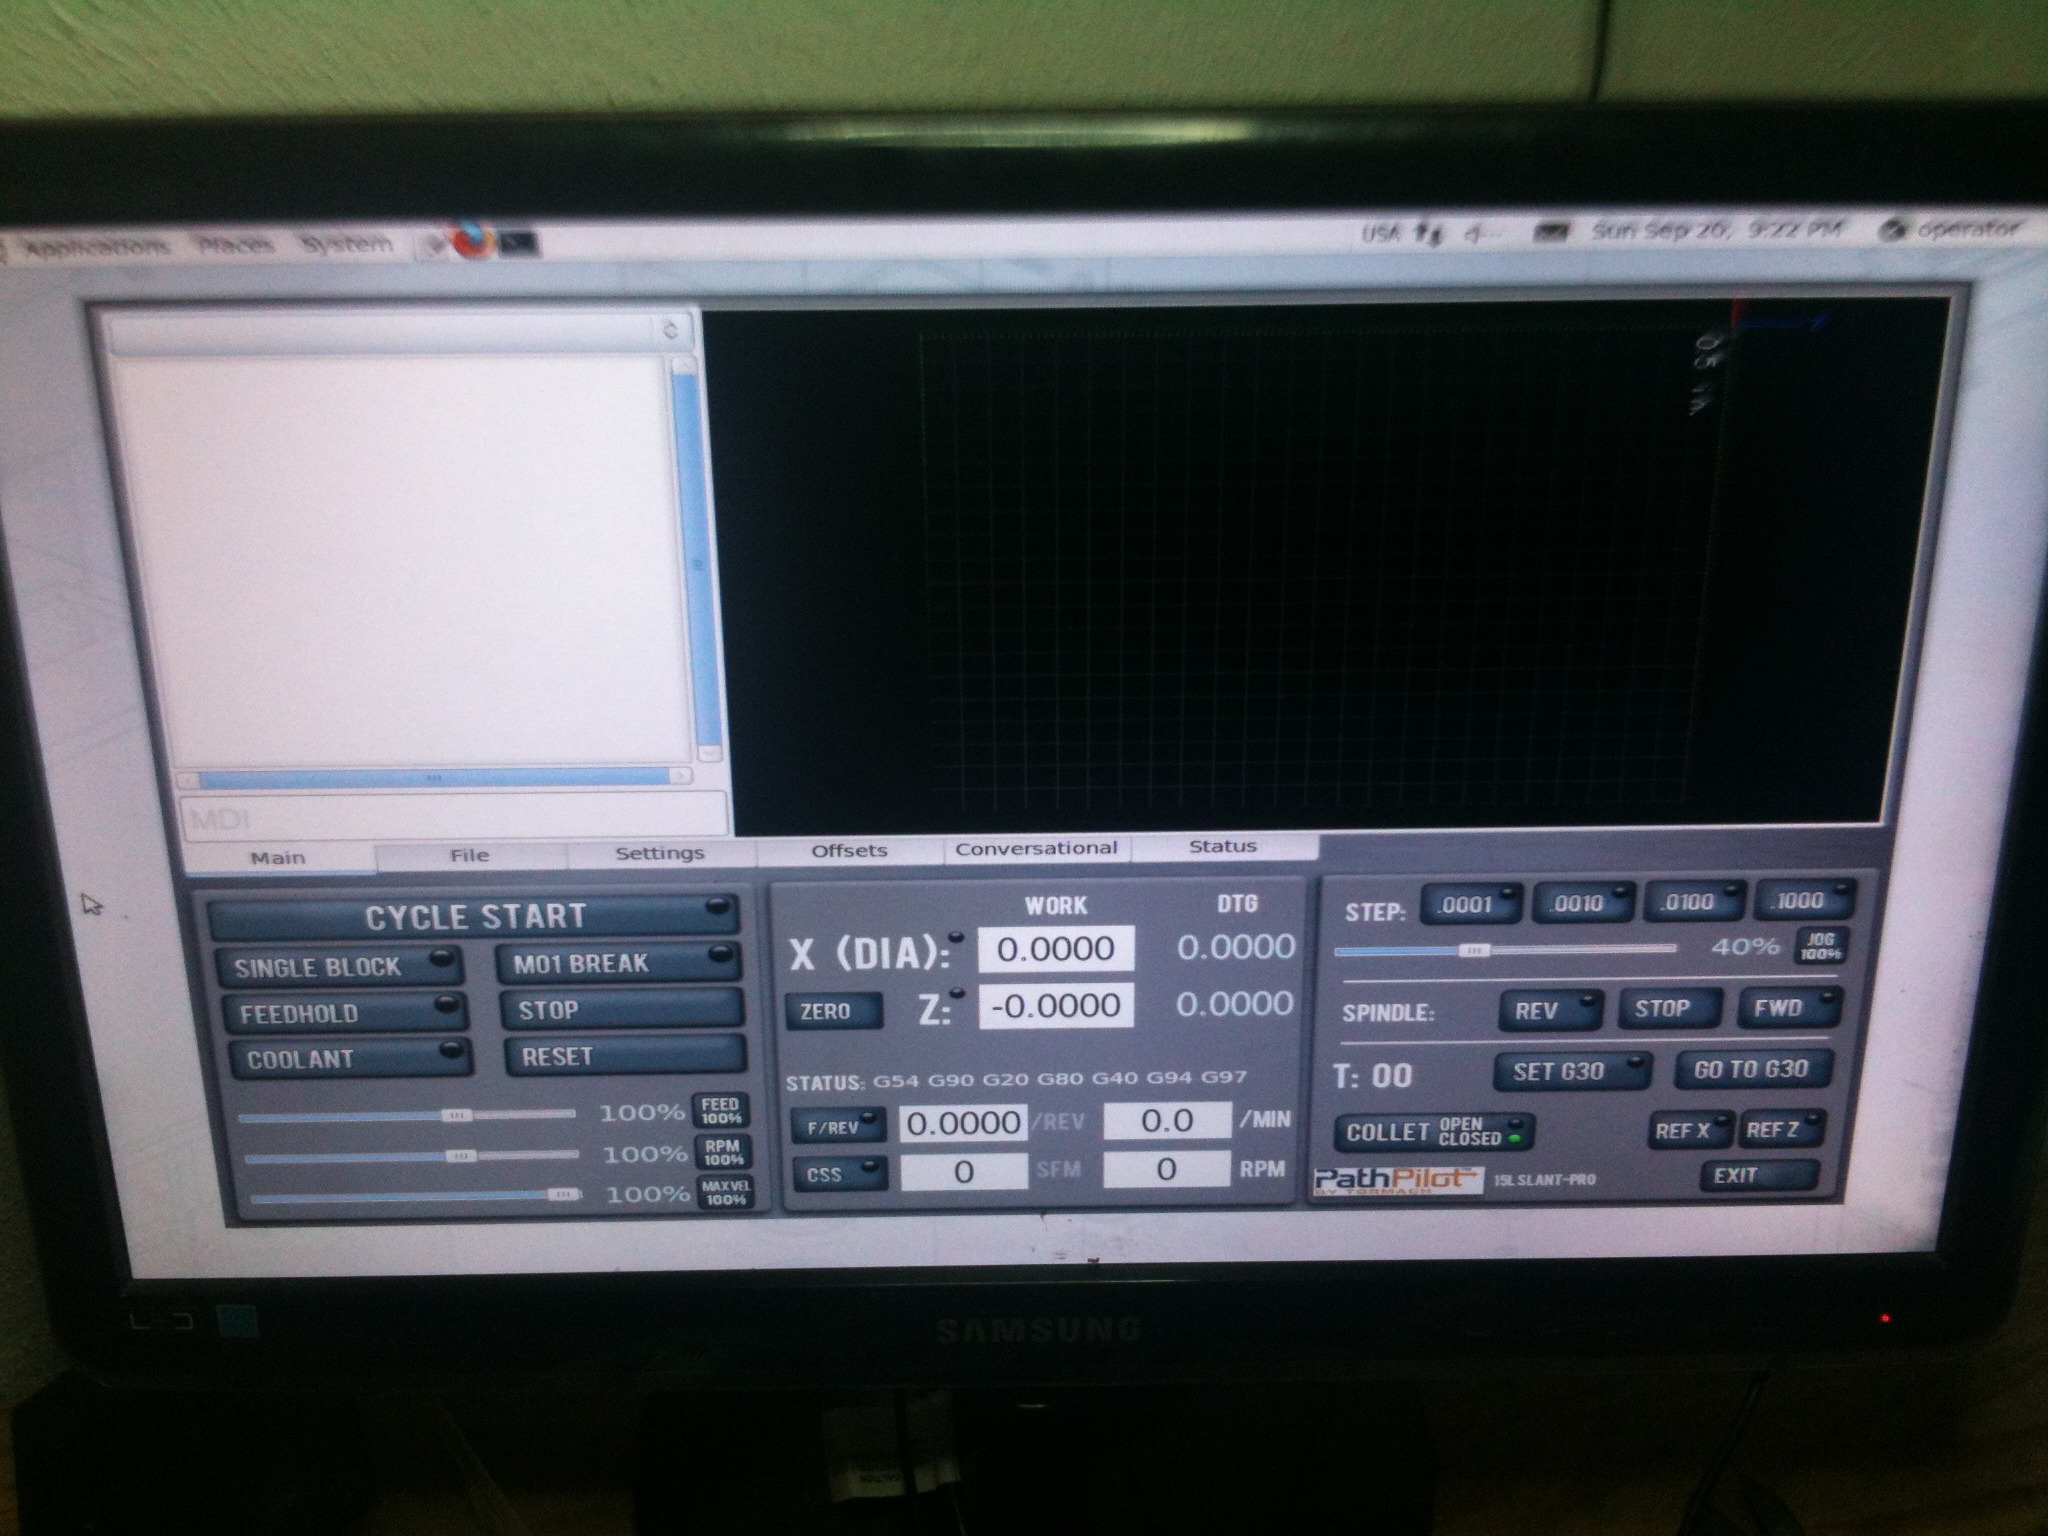
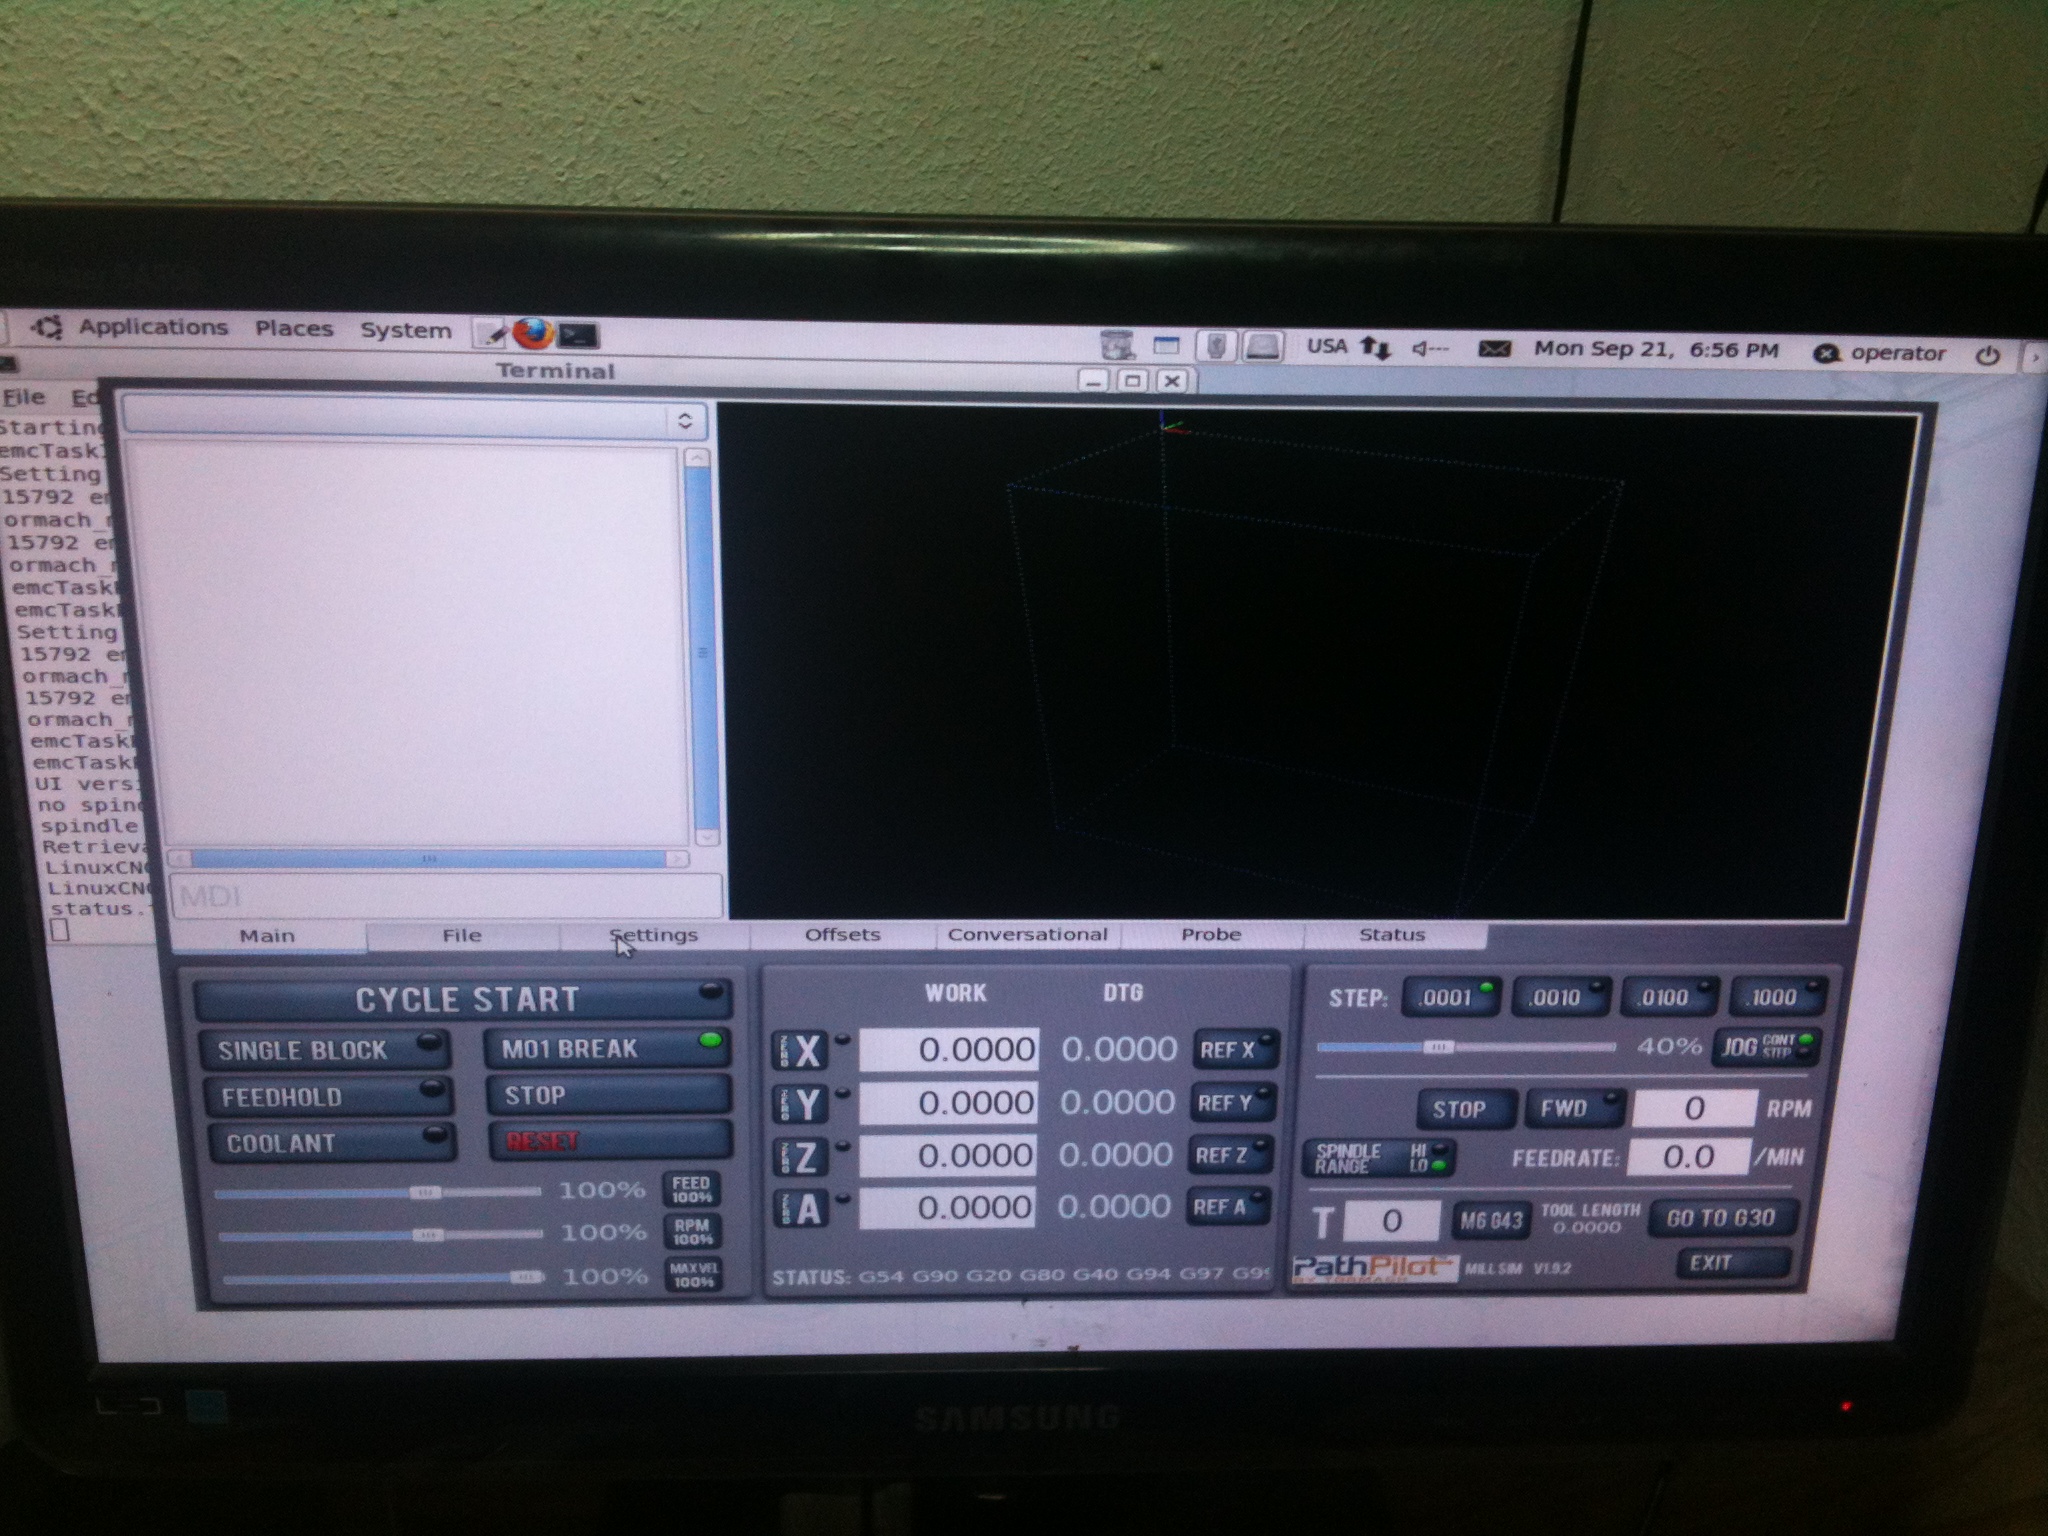
Working with the sim Config INI.
Lathe Sim INI
Mill Sim INI
Default Root Password is: “operator” with out “” if needed.
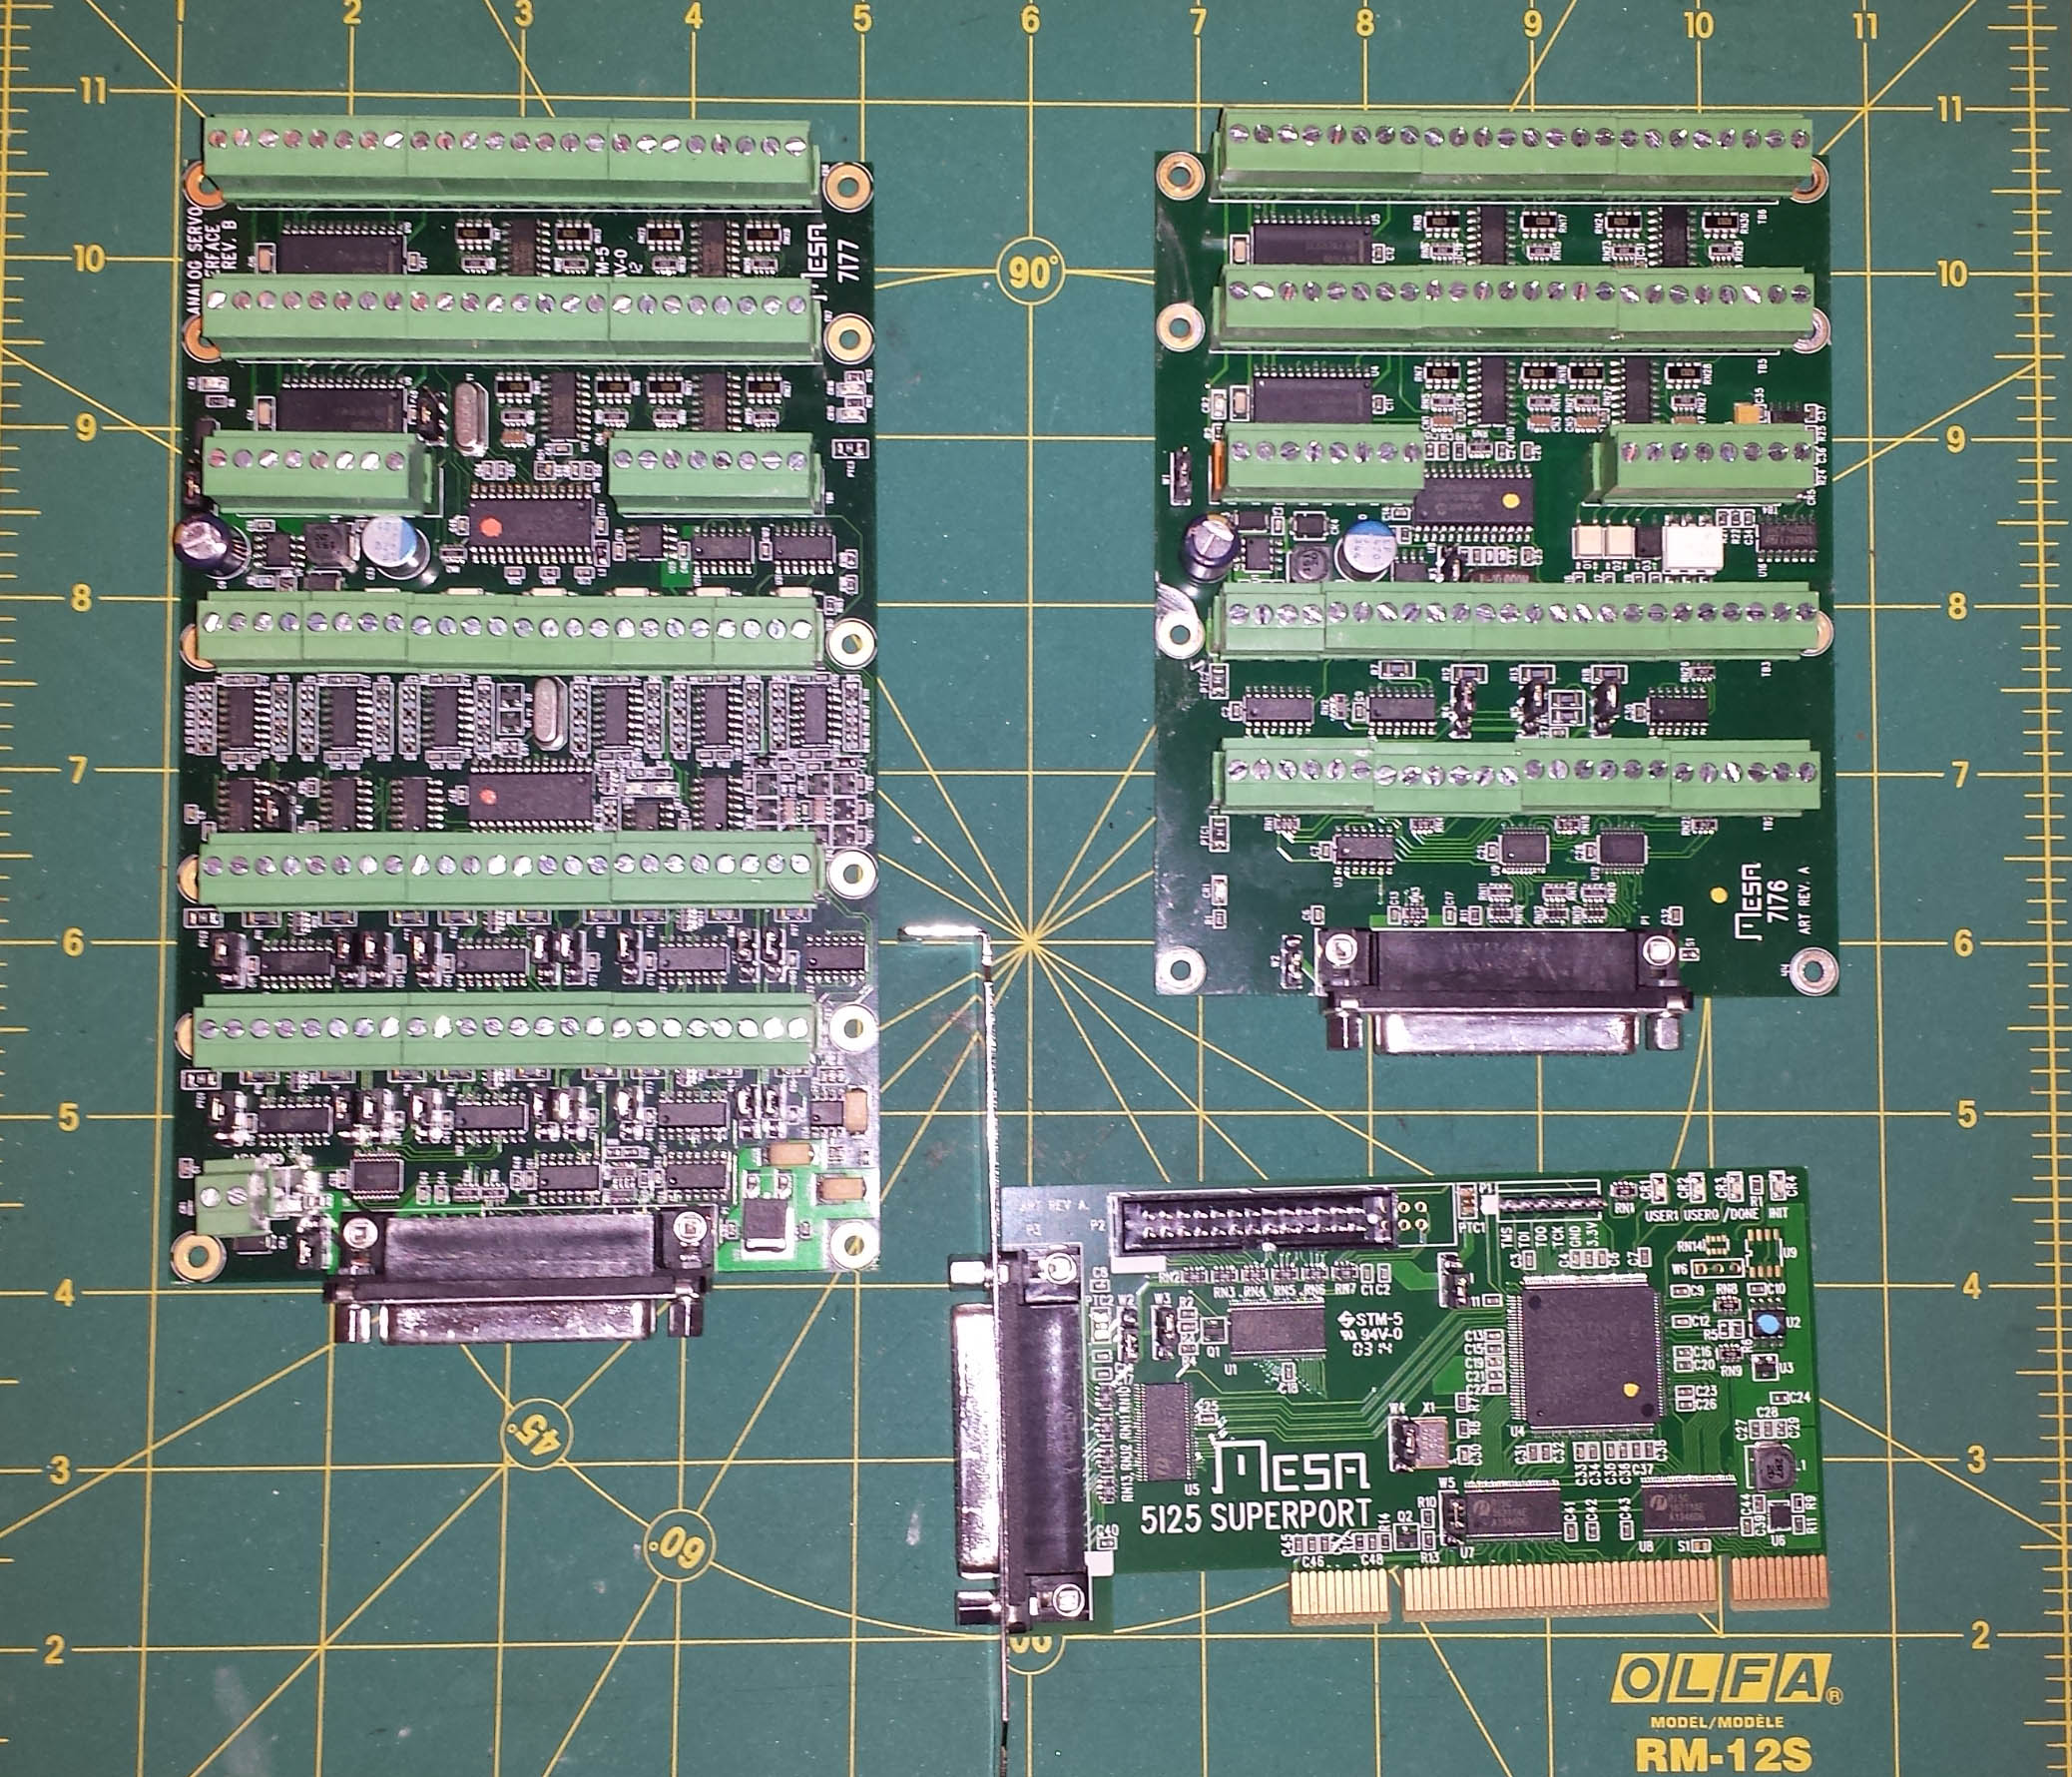
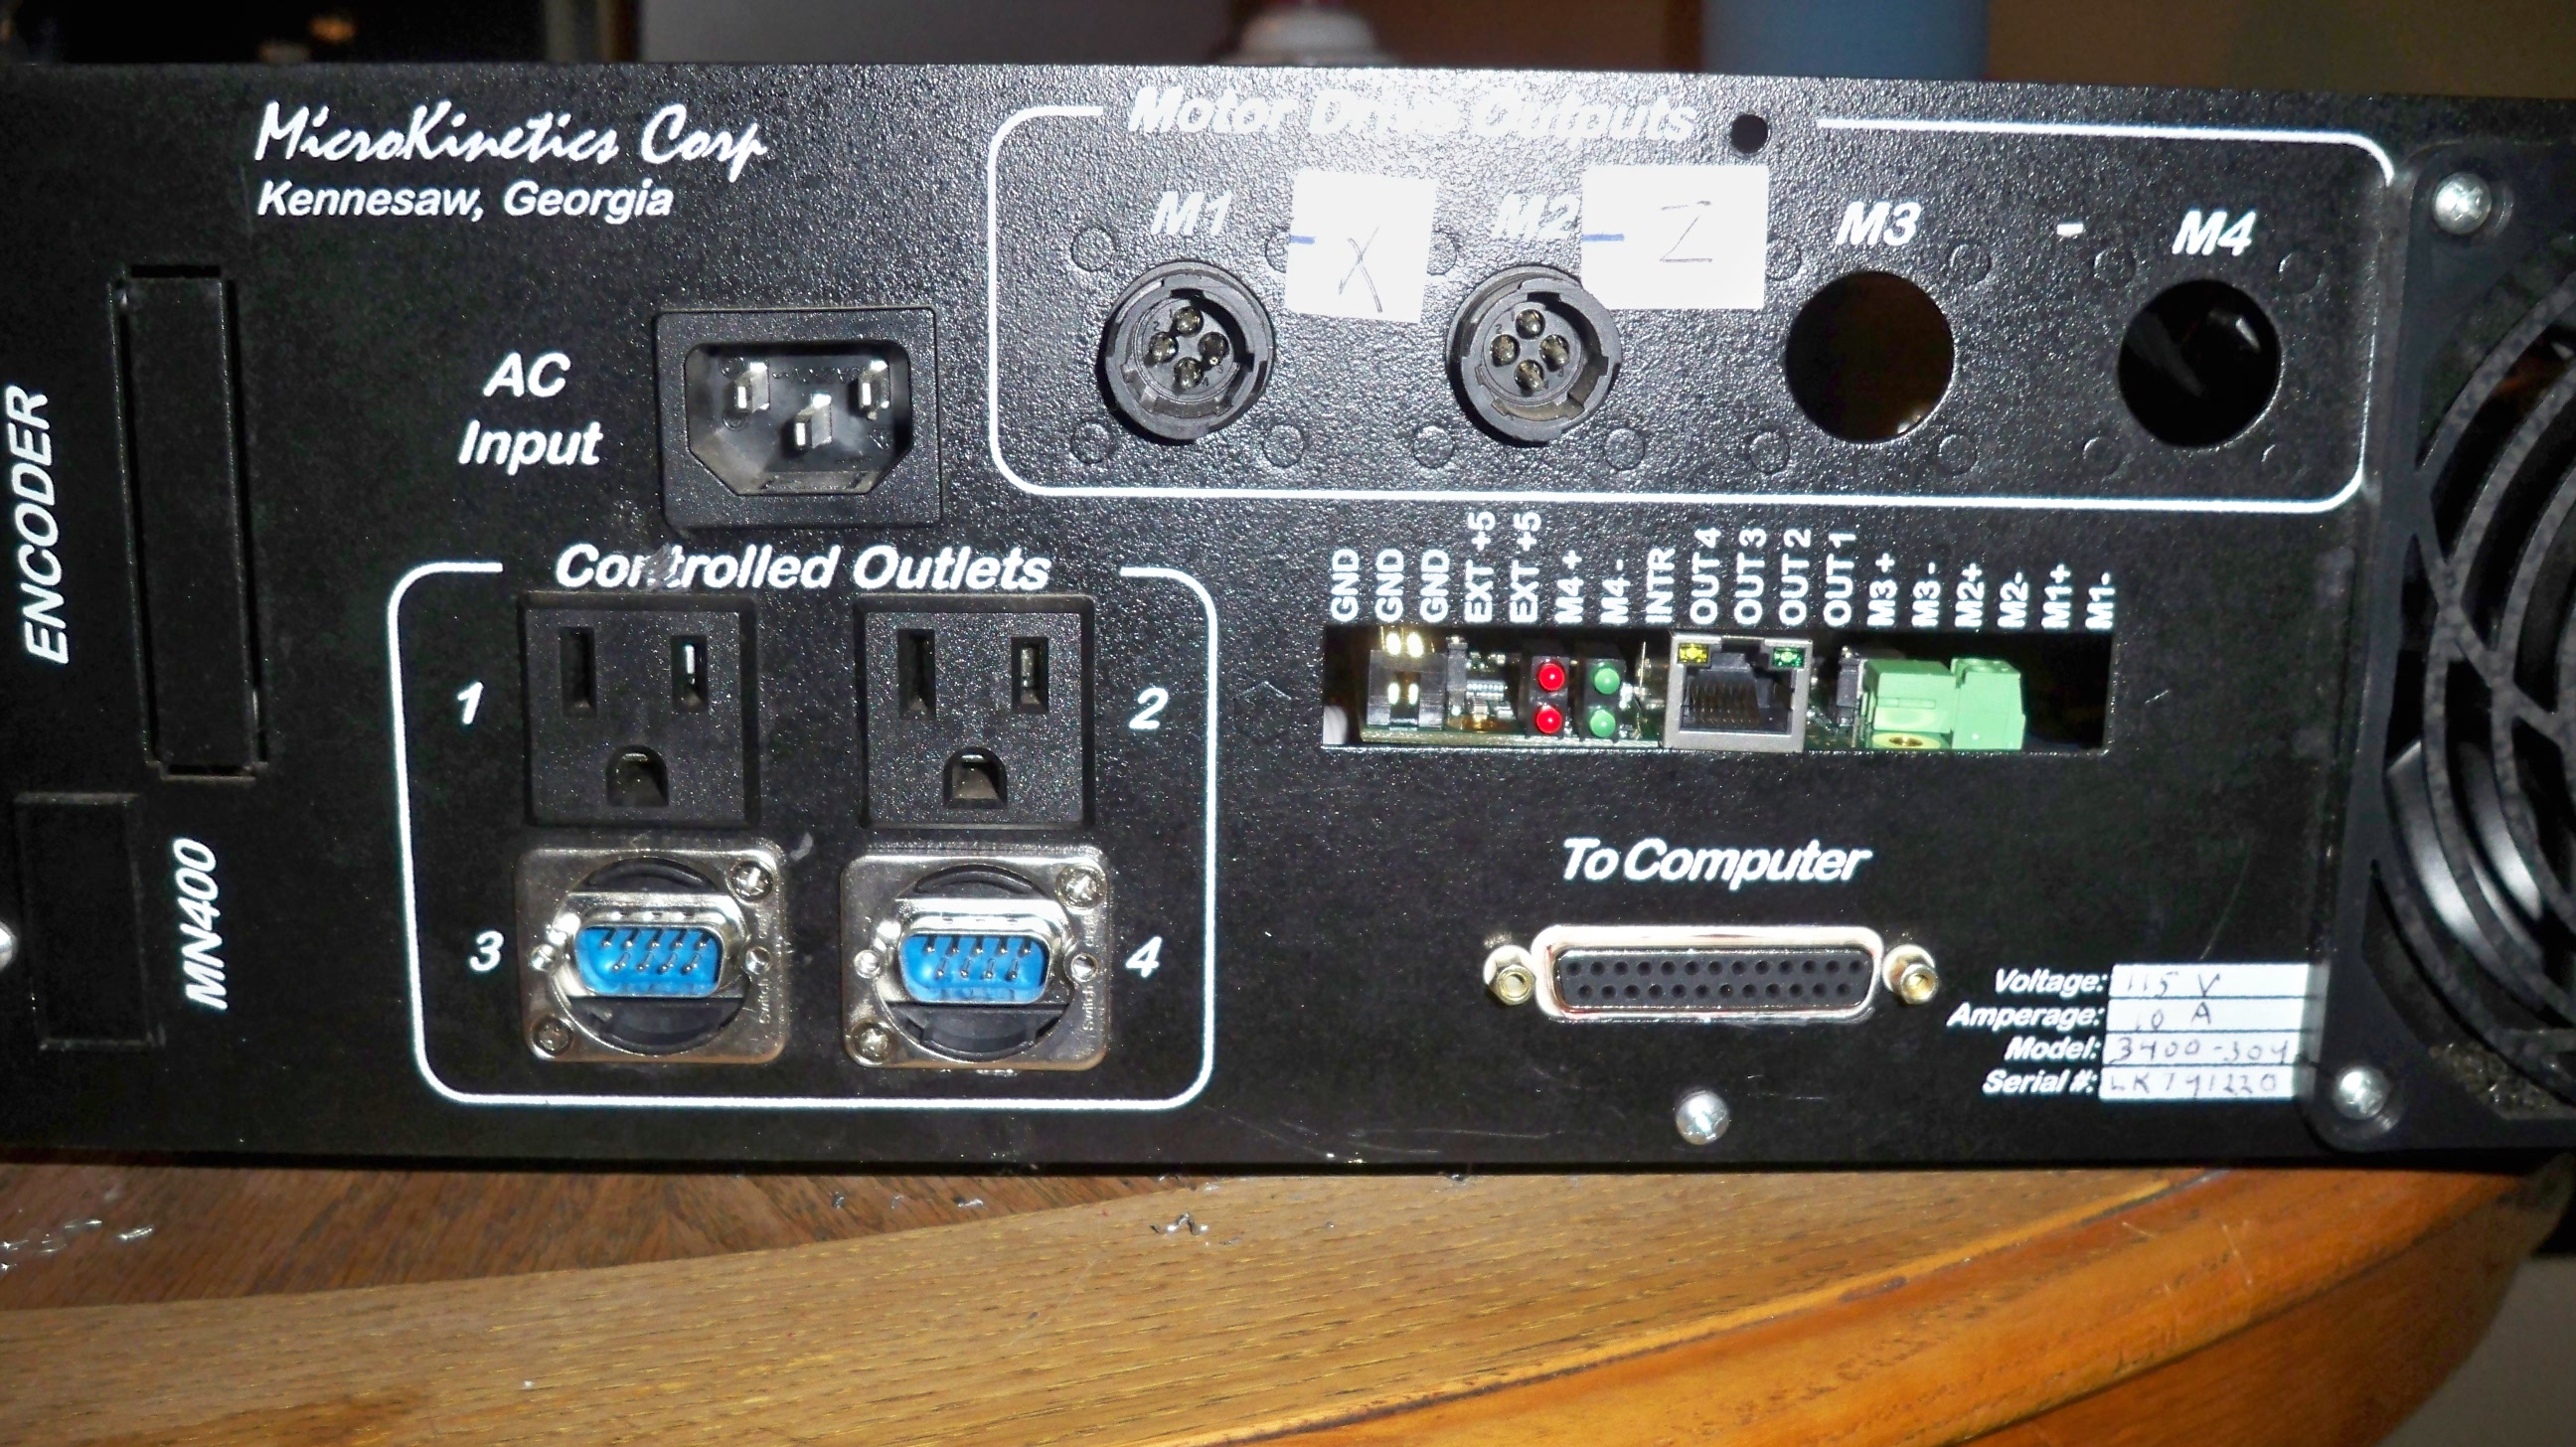
Mesa Cards…. Left 7I77 Right top 7I76 Bottom Right 5I25.
08-07-2016 Not Much Progress Been Busy!!
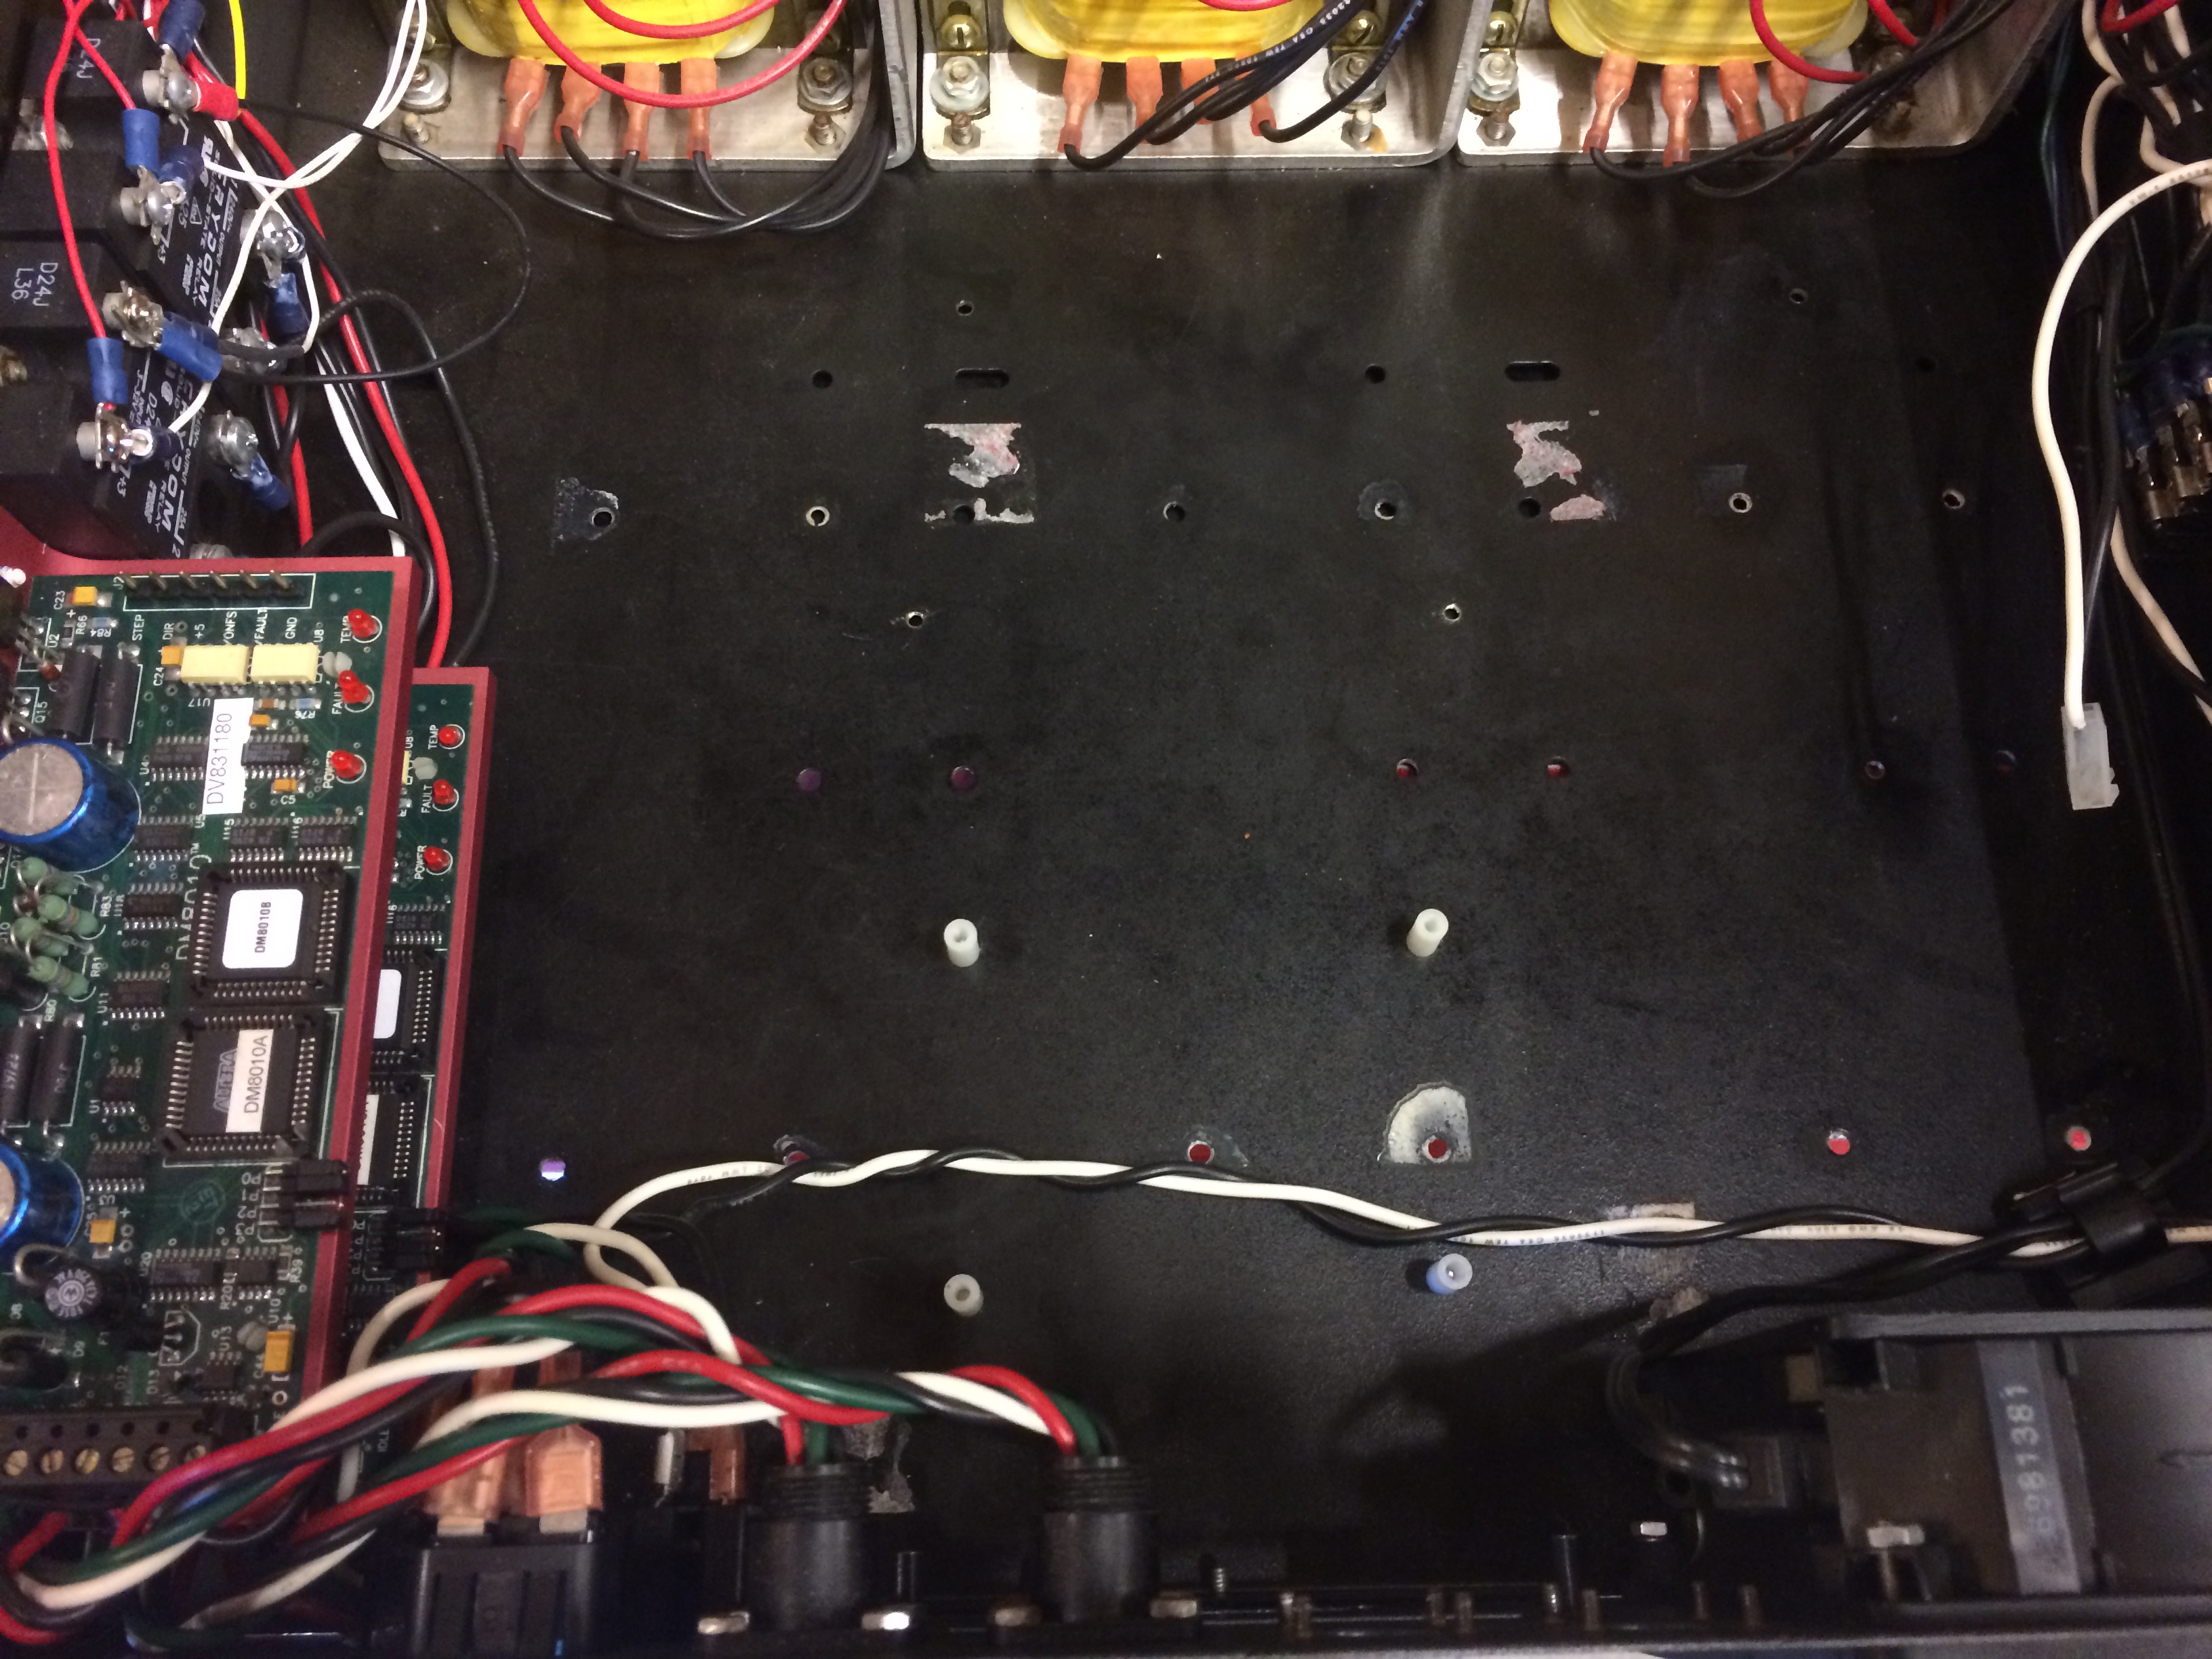
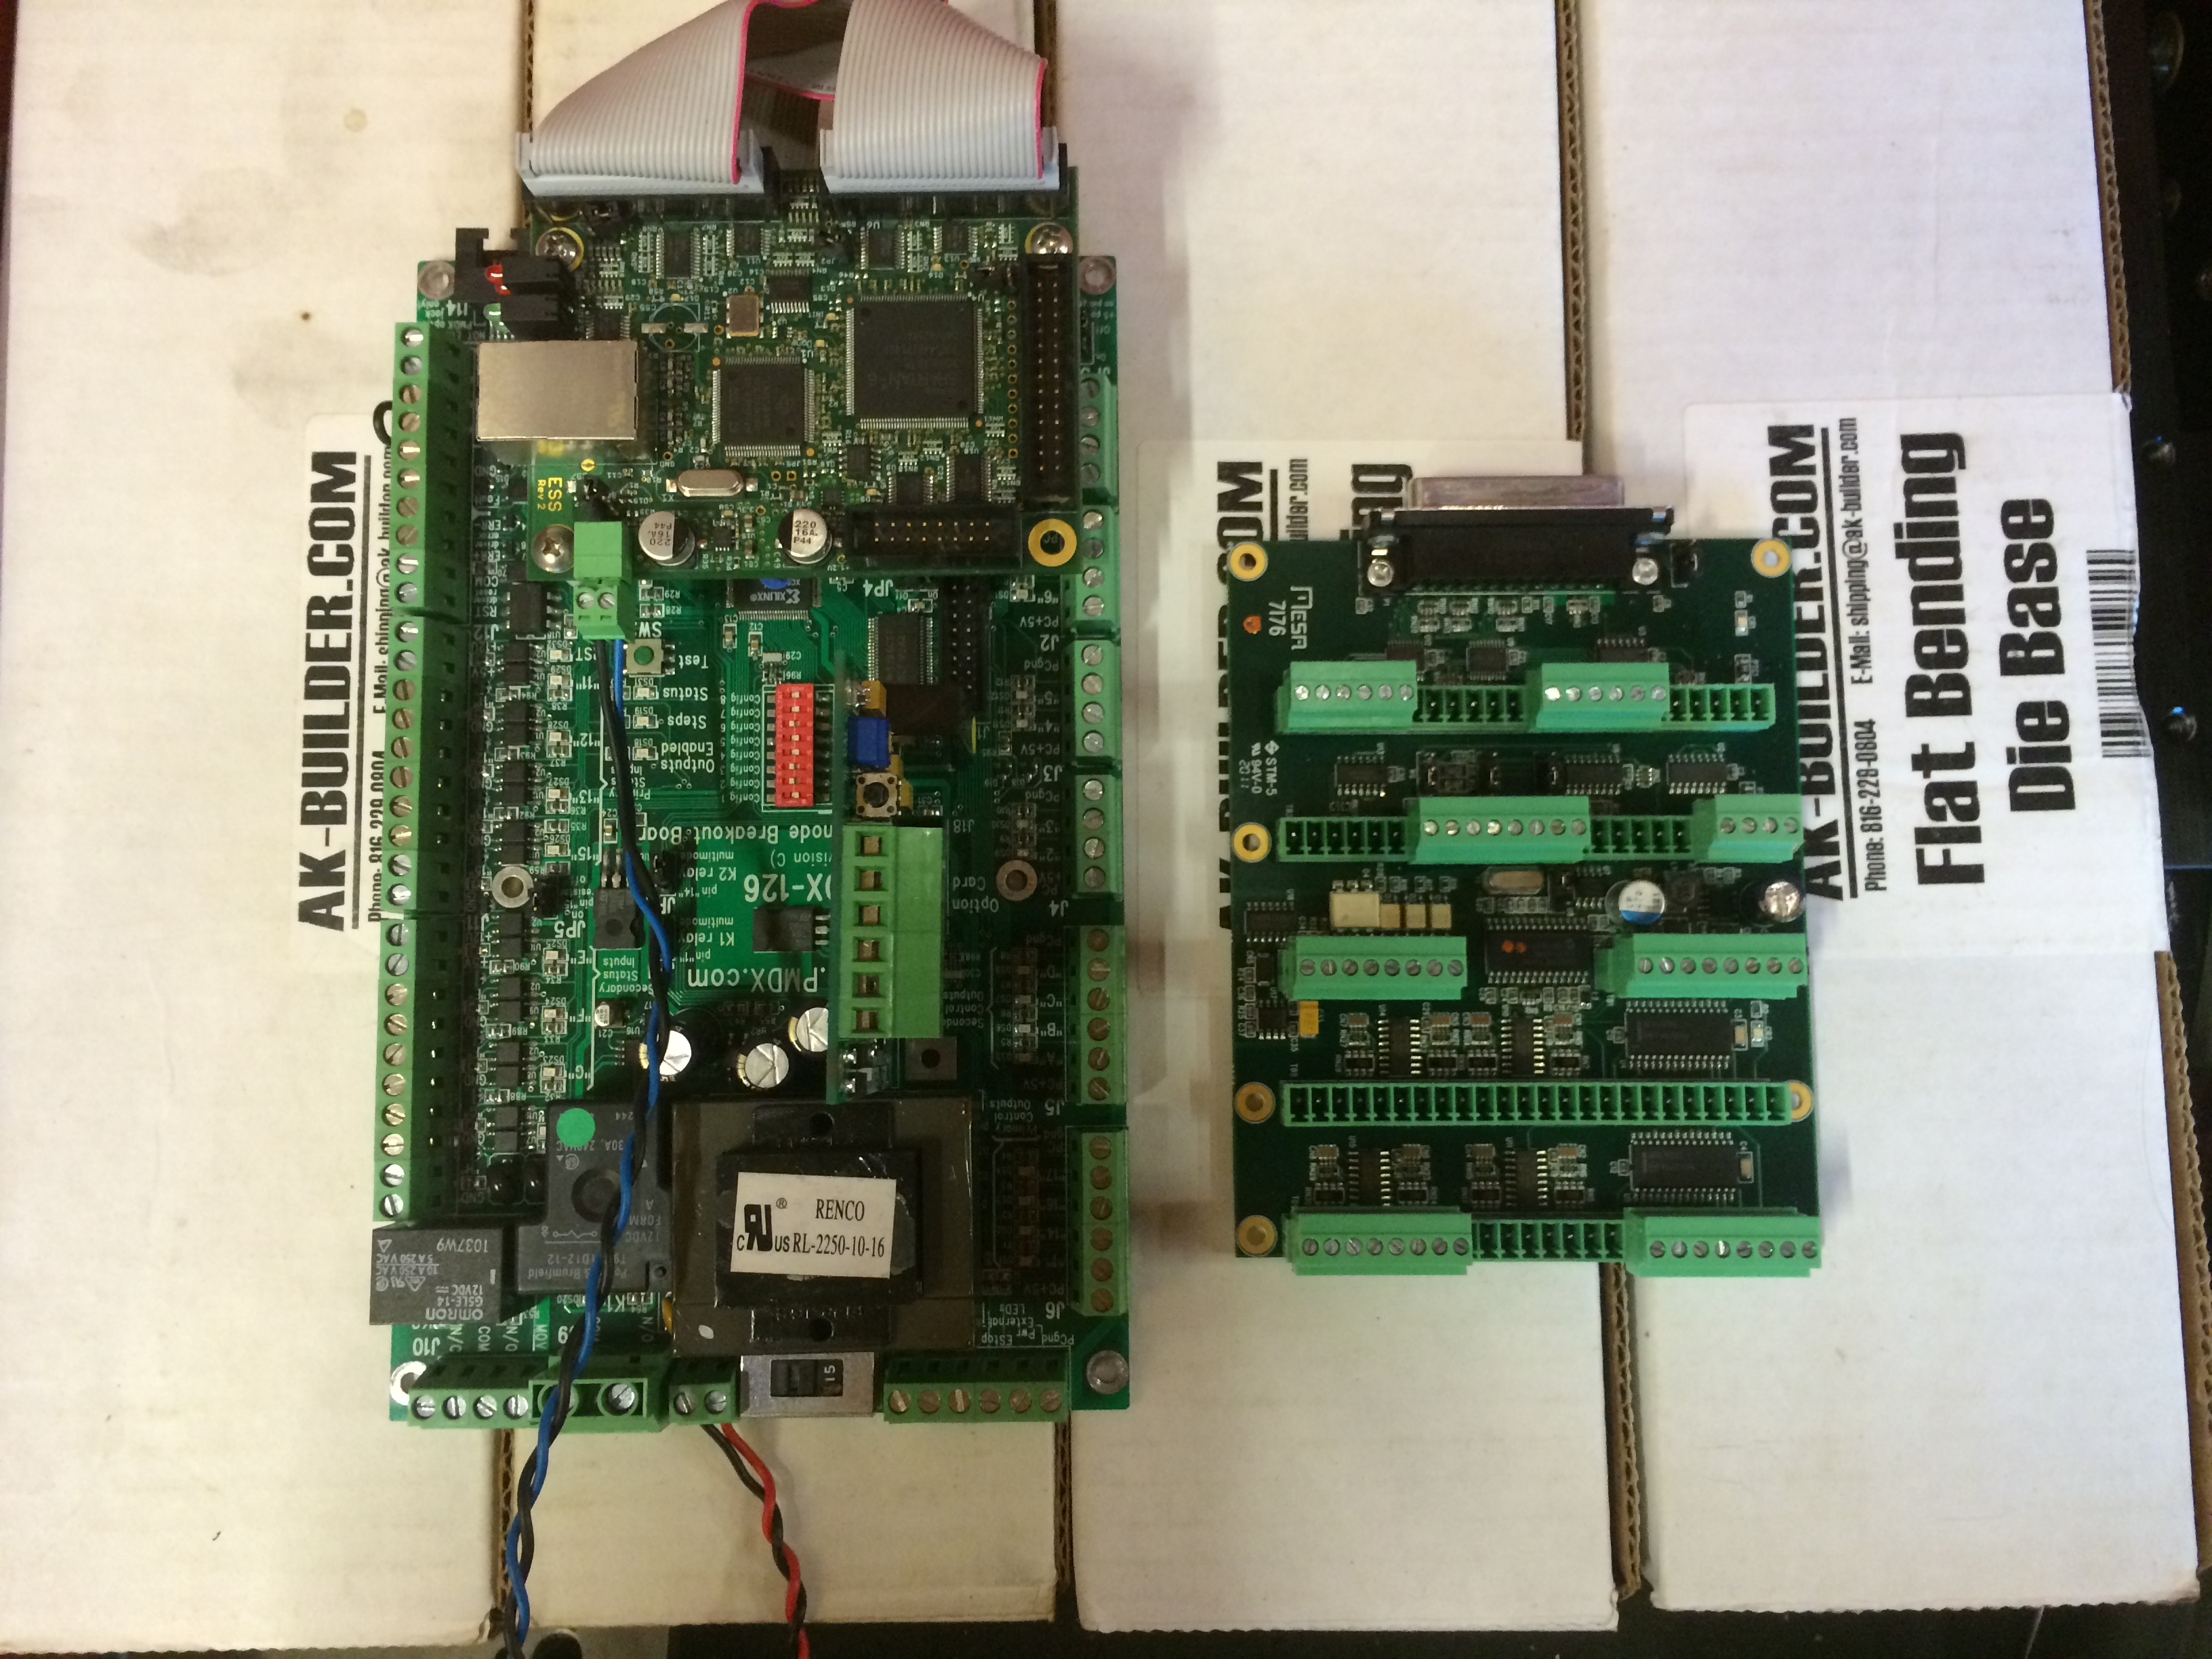
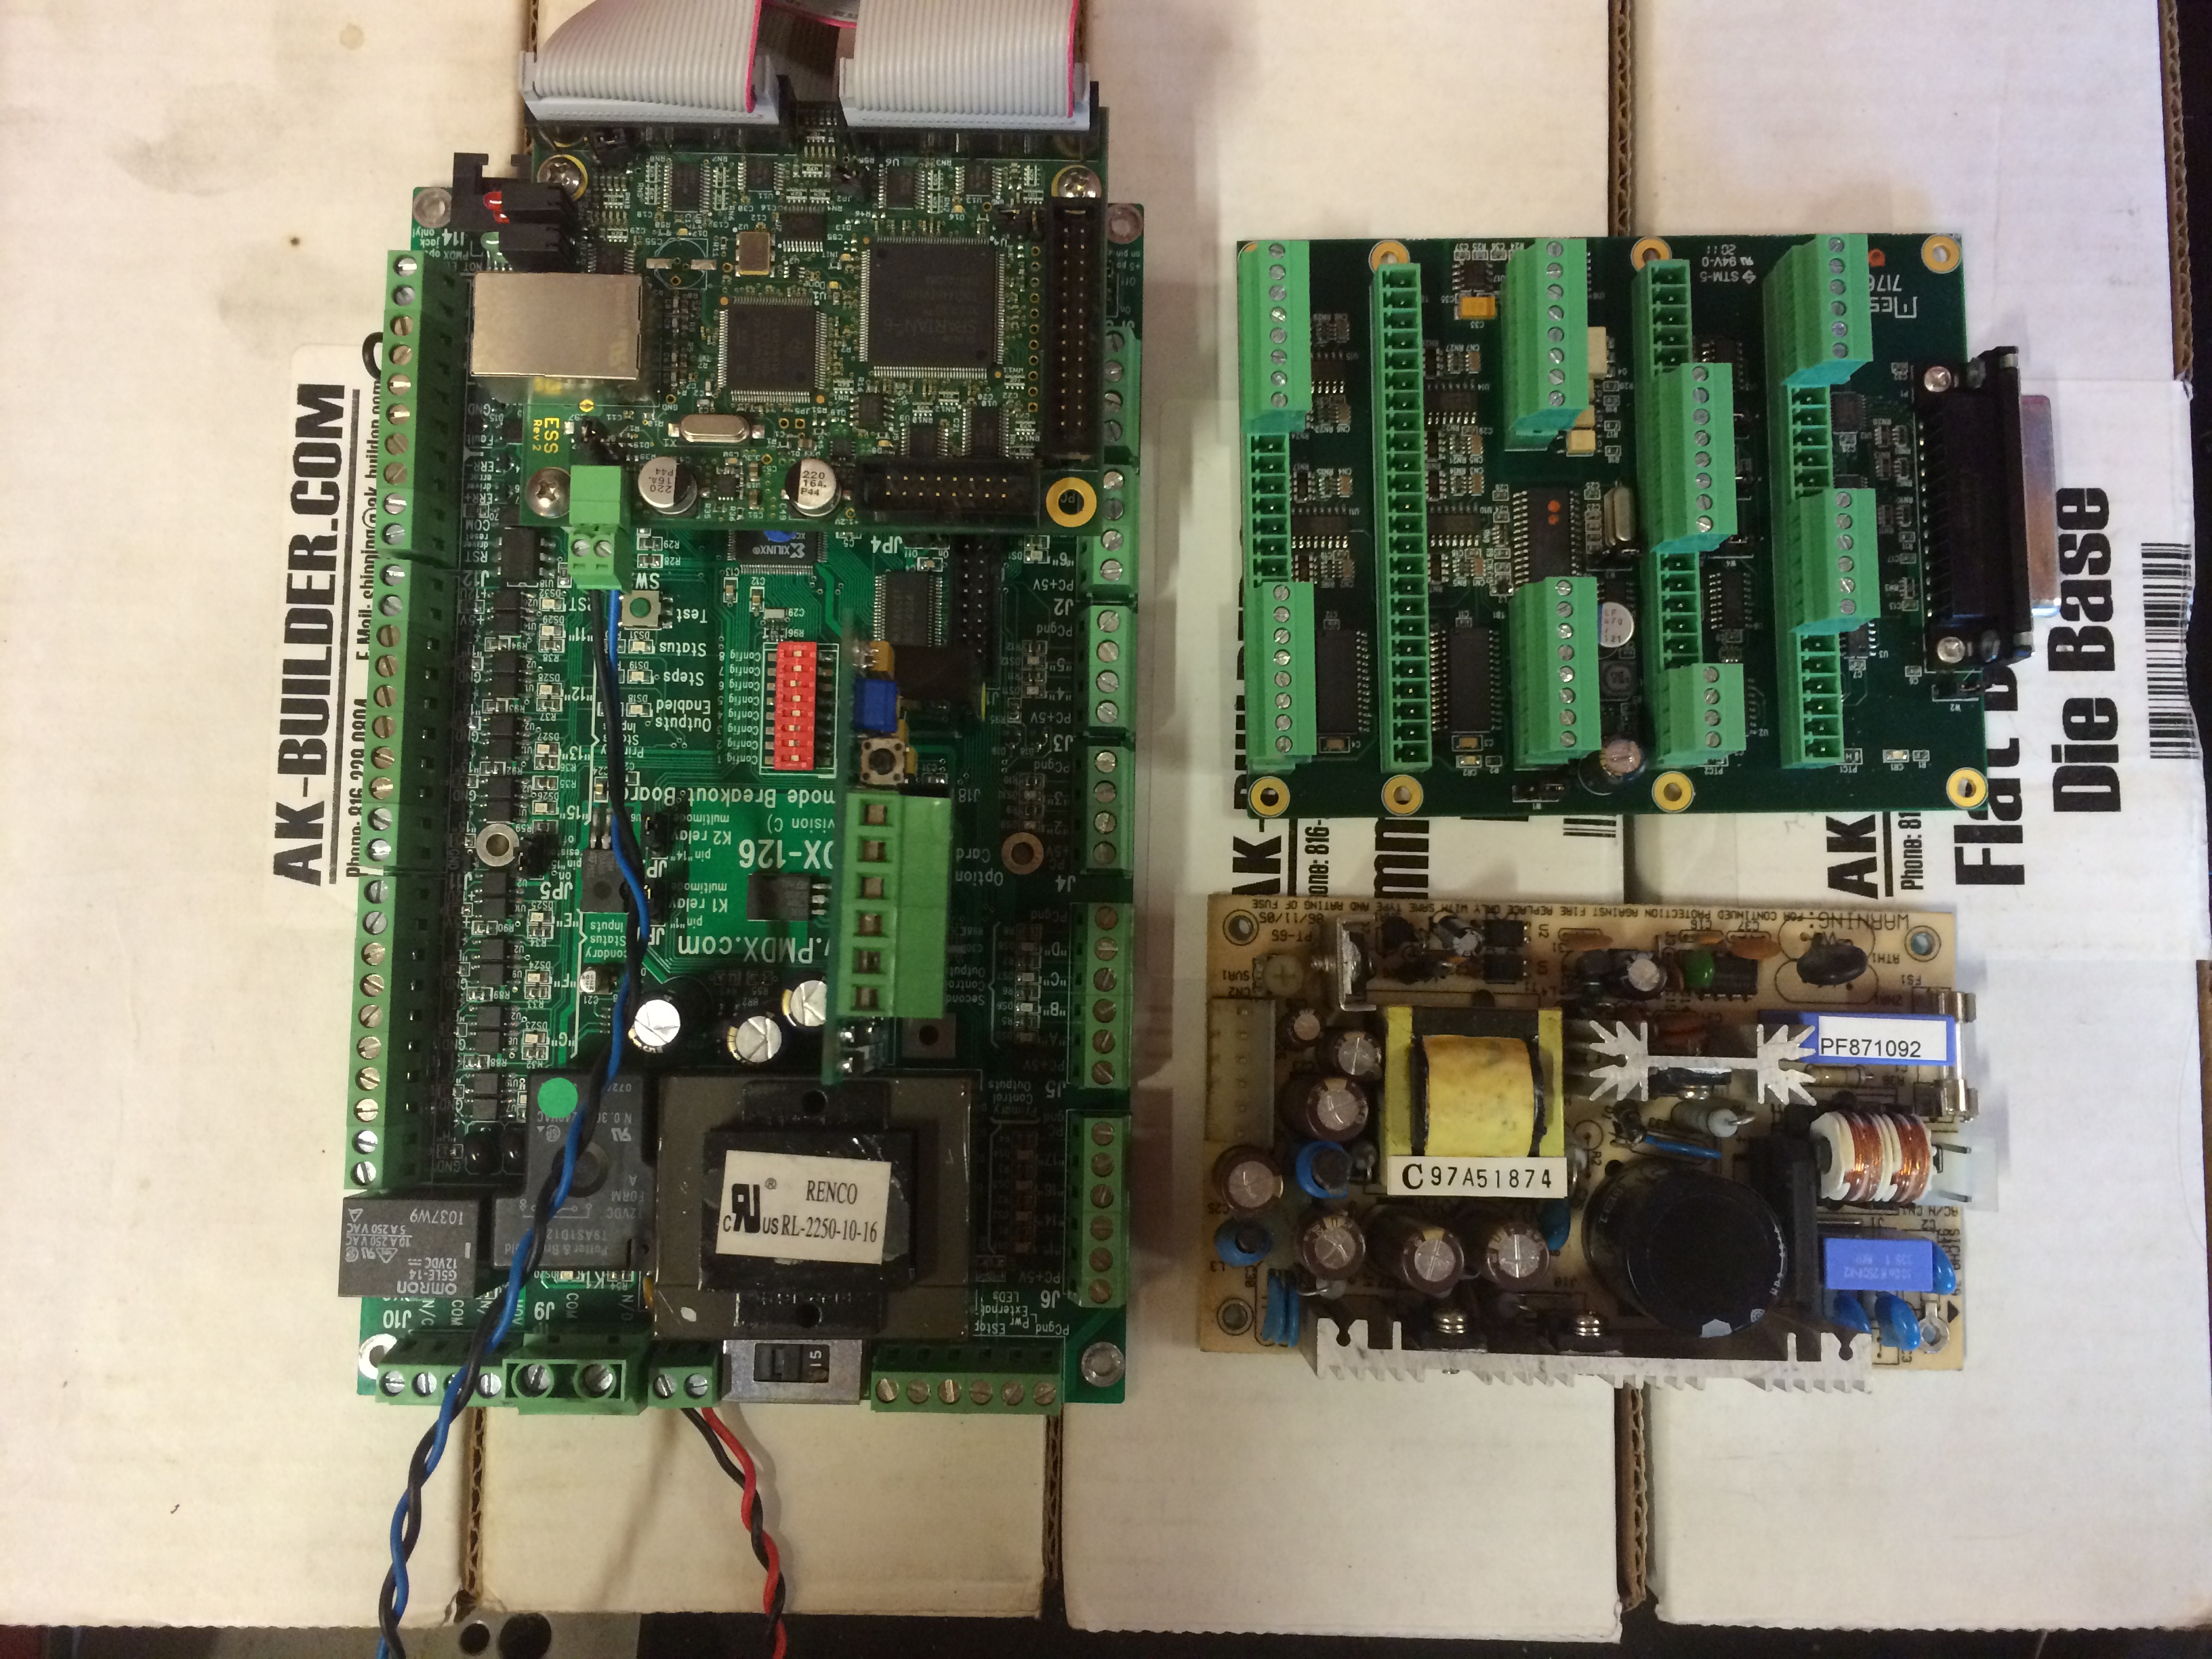
Removed The PMDX-126 PMDX-107 & Ethernet Smooth Stepper From The Drive Rack!
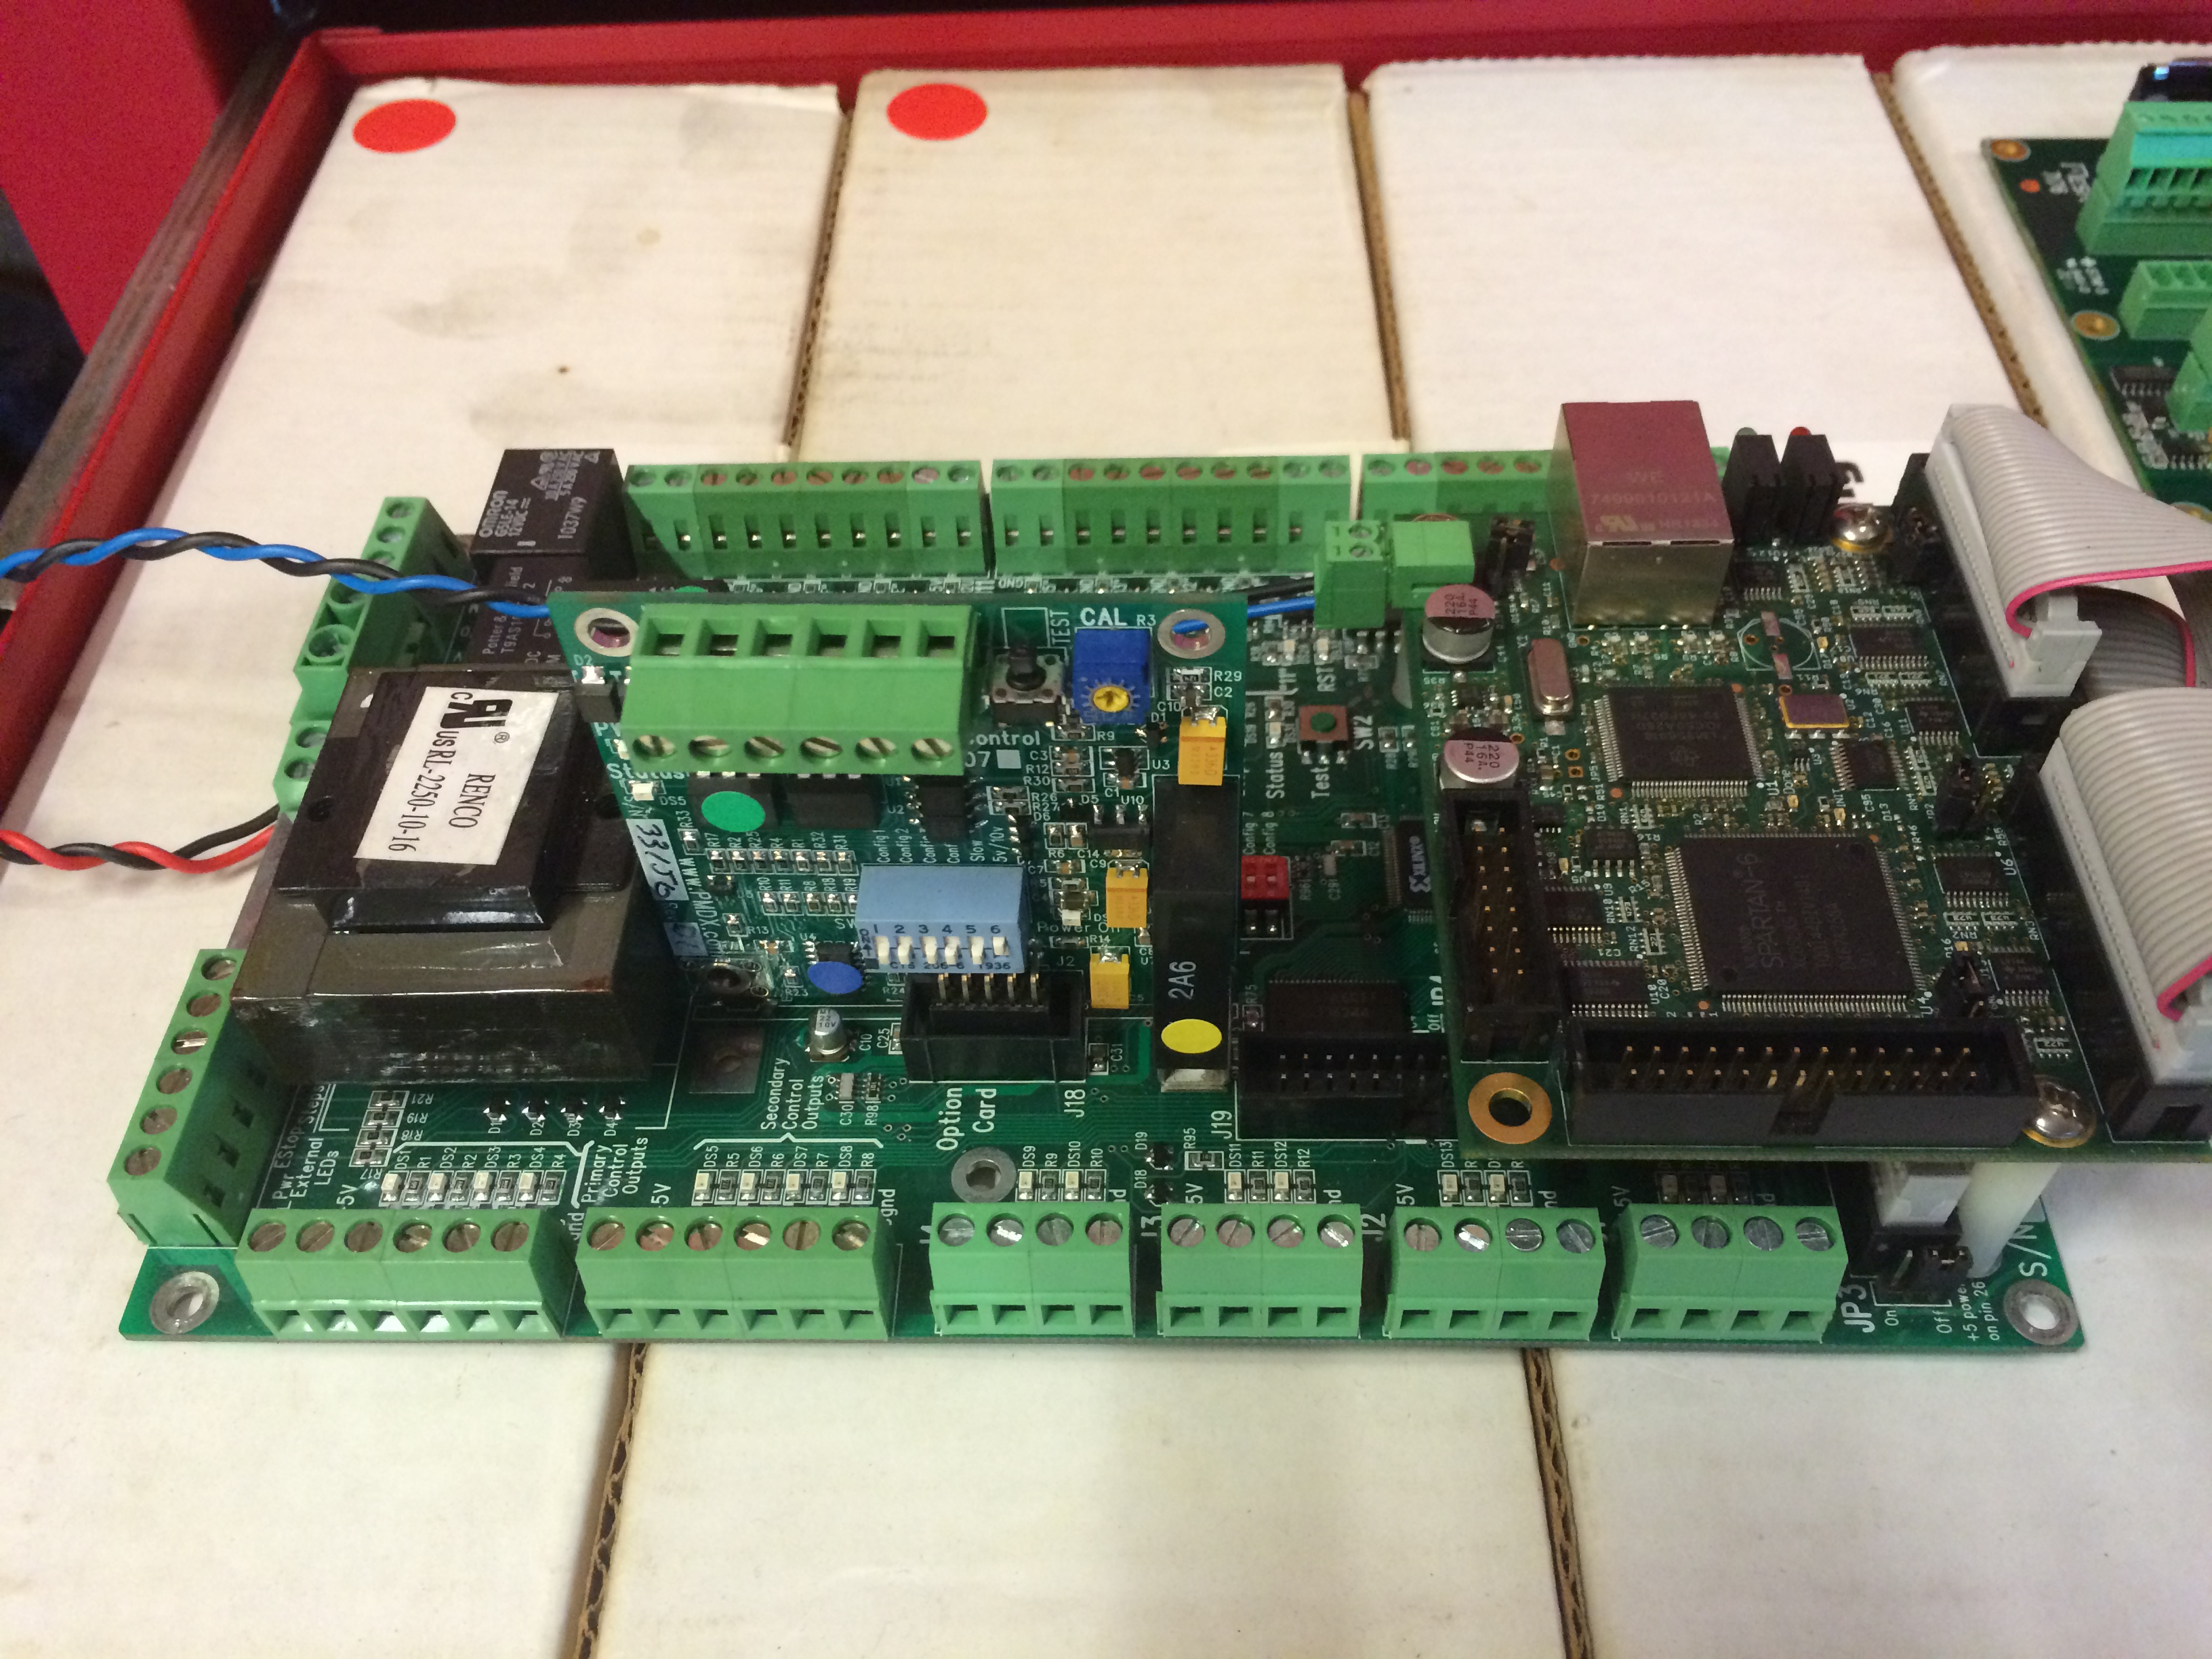
Installed Stand Off’s For the Mesa 7I76 And Yea, the MESA Cards use smaller diameter screws so these standoff’s will not work but they are 1/2″ high. This allows you to use the factory DB25 Cutout on the back.
Test Fitting the Mesa 7I76
Comparison of the PMDX-126 Vs. The Mesa 7I76 Lots of Space Saved In the Drive Rack.
Drive Rack Came With a Mean Well PT-45B 5V & 12V (Removed PCB Lower Right) I Will Replace it With a PD-45B 5V 24V Power Supply to Provide Field of a Standard 24V to the Mesa Card “12V Will Work But Most Field Stuff Sensors Etc. Seem to be better at 24V.
Working on the Wiring Plan Tonight.
When Wiring is Done and Path Pilot is Working I Will Post it and the Config Files For COnverting The Drive Rack and Microkinetics Lathe Retrofit to Work With Linux CNC based Tormach Path Pilot Software.
I have had a few contacts on some forums on the motor connectors on the Drive Rack, Seems another item Microkinetics is Bending people over the table with is their Drive Rack Service Kits the connectors are TE Connectivity/AMP they can be found at mouser, digikey, and many other sources for just a few bucks. No Need to spend $139.00 on 4 of them or $359.00 with a crimp tool.
Connector Service Parts:
Plug 206060-1 Corresponding Pin 66105 (Must Select Wire Gauge)
Cable Clamp 1-206062-6
Receptacle 206061-1 Corresponding Pin 66099 (Must Select Wire Gauge)
Crimp Tool $23 on amazon. Pin Removal Tool Many Sources Under $10
If anyone wants to Dump the Very Limited Useless No Configurable Microkinetics Turnmaster Pro and MN400 Controller Bookmark This Page!
First Movements Under Path pilot!
[youtube]https://www.youtube.com/watch?v=GsQu6qKhbbQ[/youtube]
Next Step Is Step Drive Timing Unfortunately the USB Stick I had the original data on took a dump on me so back to Square One!
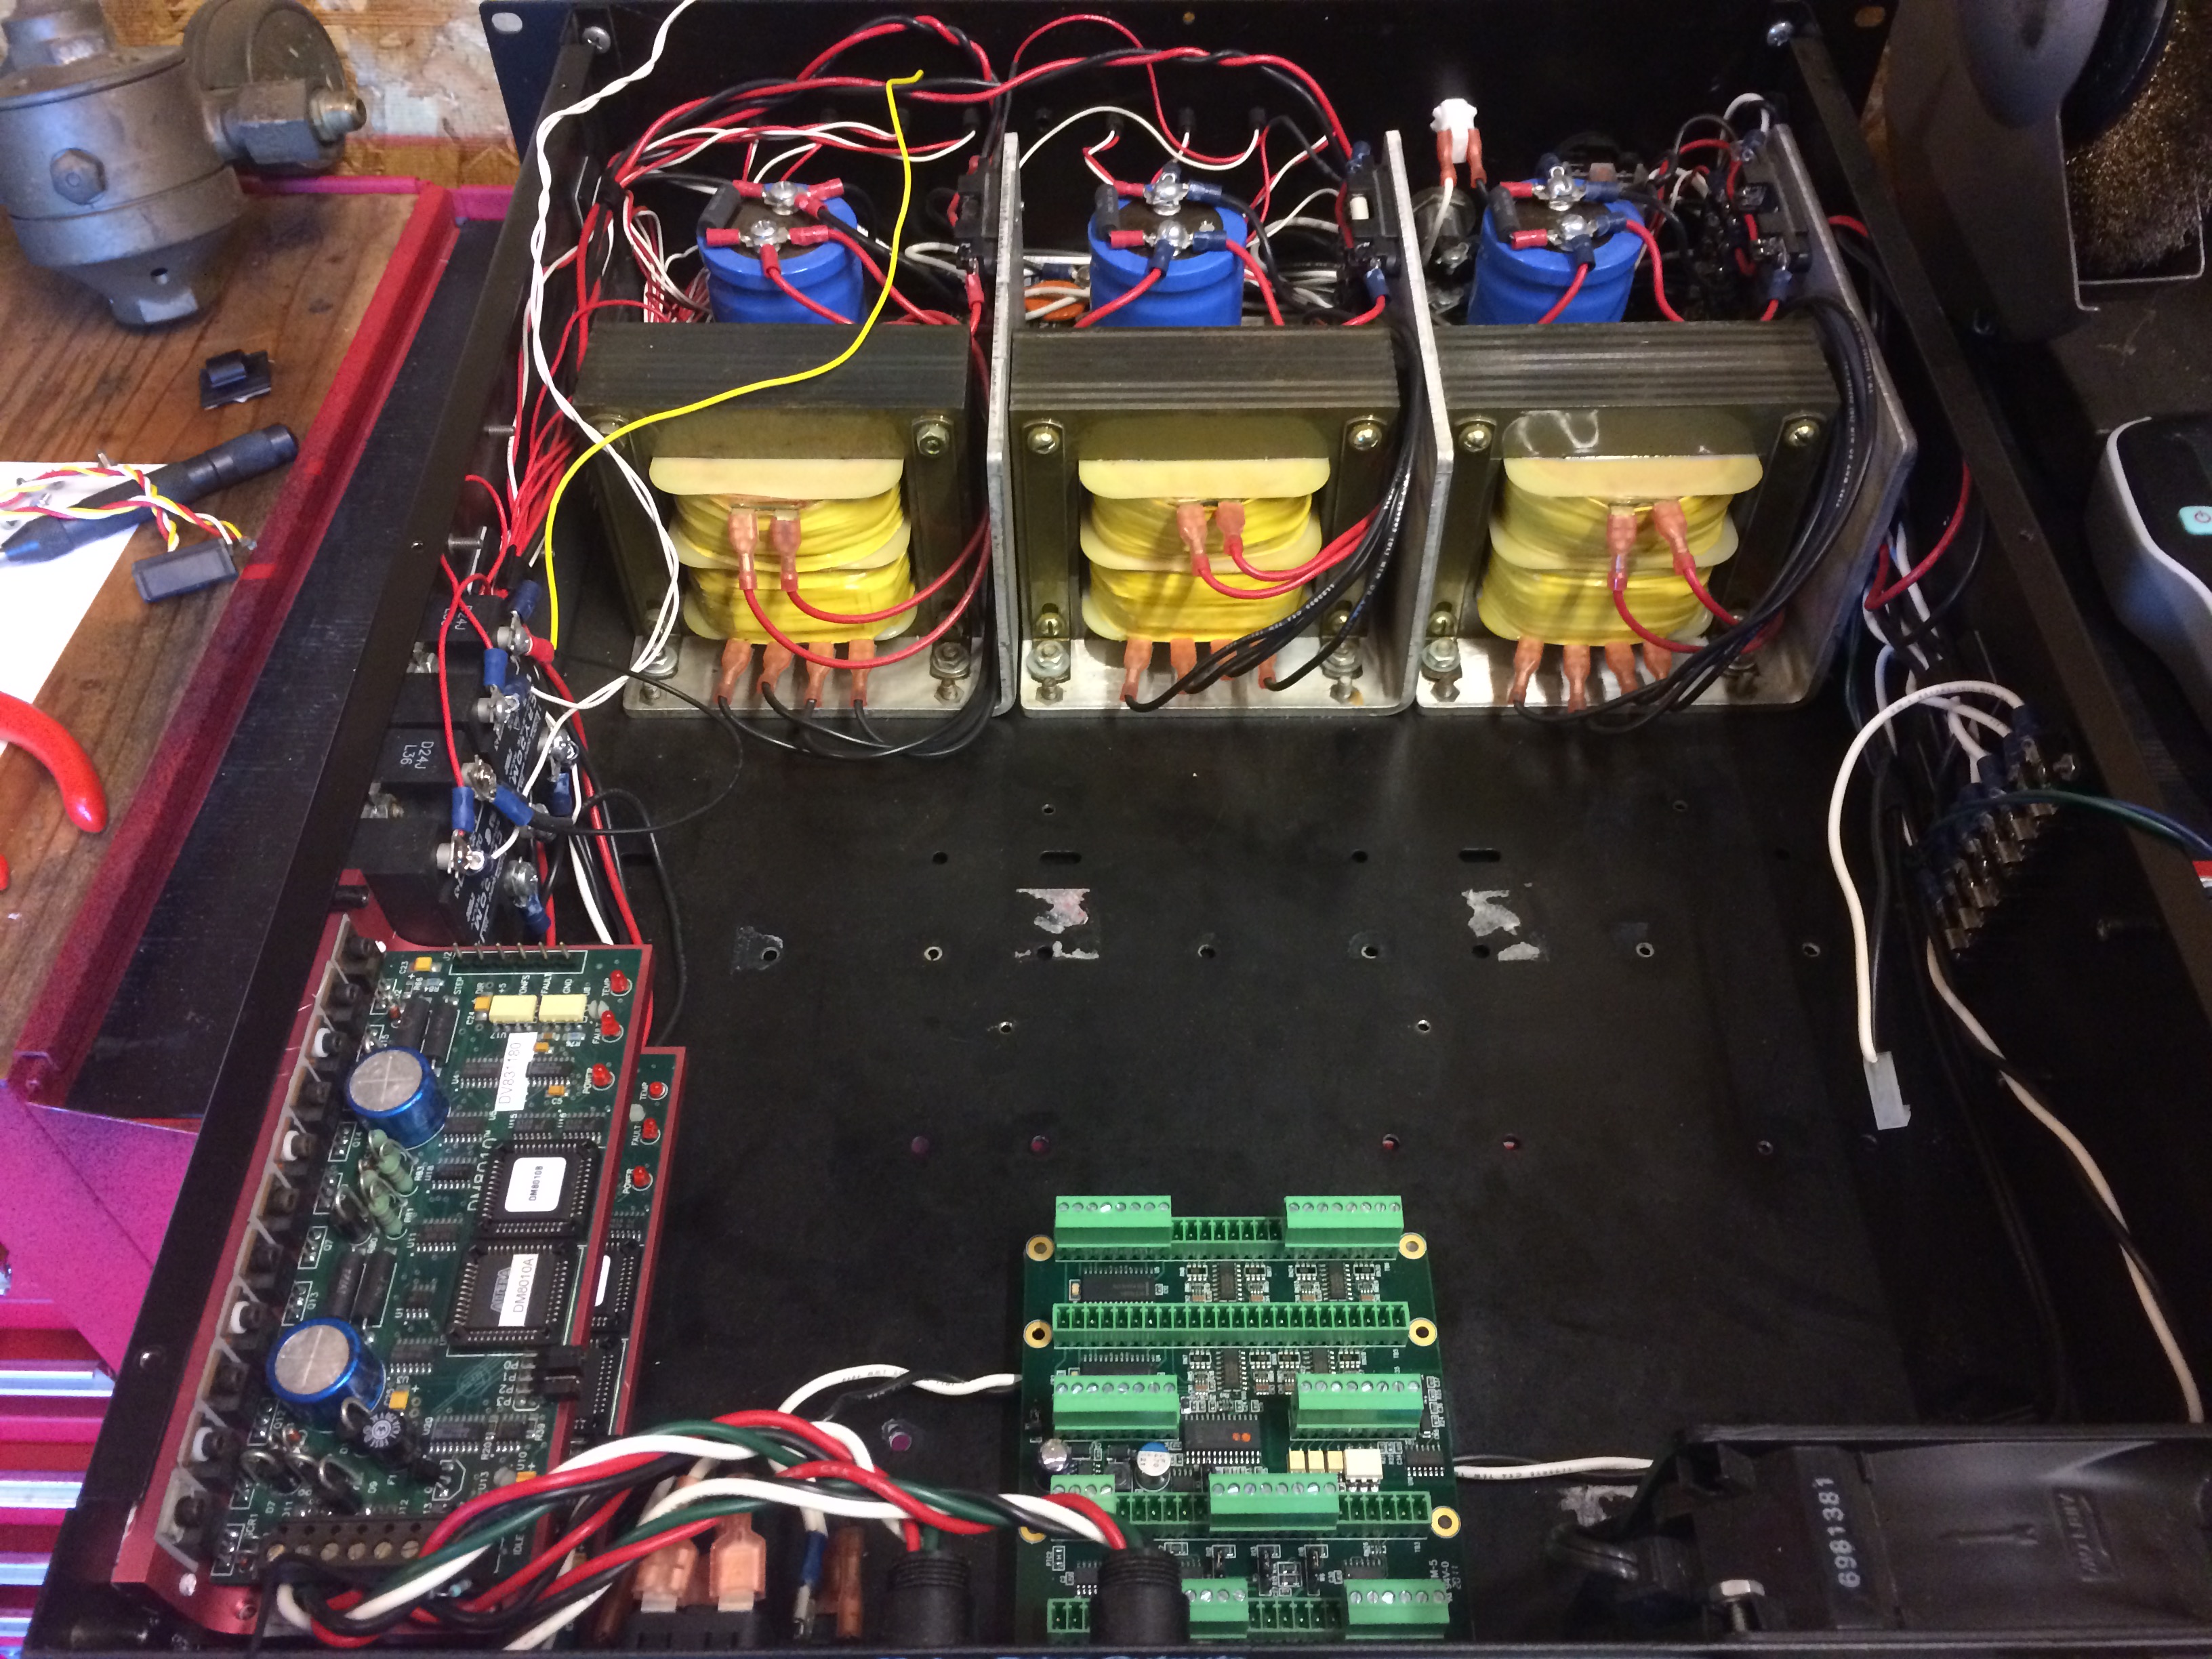
DM8010 Drive Info:
Freq Step Frequency: 0 to 300 kHz
Chopping Rate 20khz Nominal
Machine Info:
Screw Diameter Major: 0.62in
Screw Diameter Nominal: 0.631in
Standard Lead Accuracy: ± 0.003 in/ft
Thread Direction: RH
Travel Per Shaft Rev: 0.200in
Turns to Travel 1″: 5
Gear Ratio: 1:2
Gears: The Microkinetics Lathe Retrofit Manual Is Not Correct On the Part Numbers!
Z Axis:
Stepper Motor Shaft: P10L050 – 10 Teeth
Ball Screw: QD20L050 or 20l50JA With JA 1/2 Bushing 20 Teeth
X Axis:
Stepper Motor Shaft: 20XL037 – 20 Teeth
Ball Screw 40XLB037 – 40 Teeth With 3/8-24 Threaded Bore
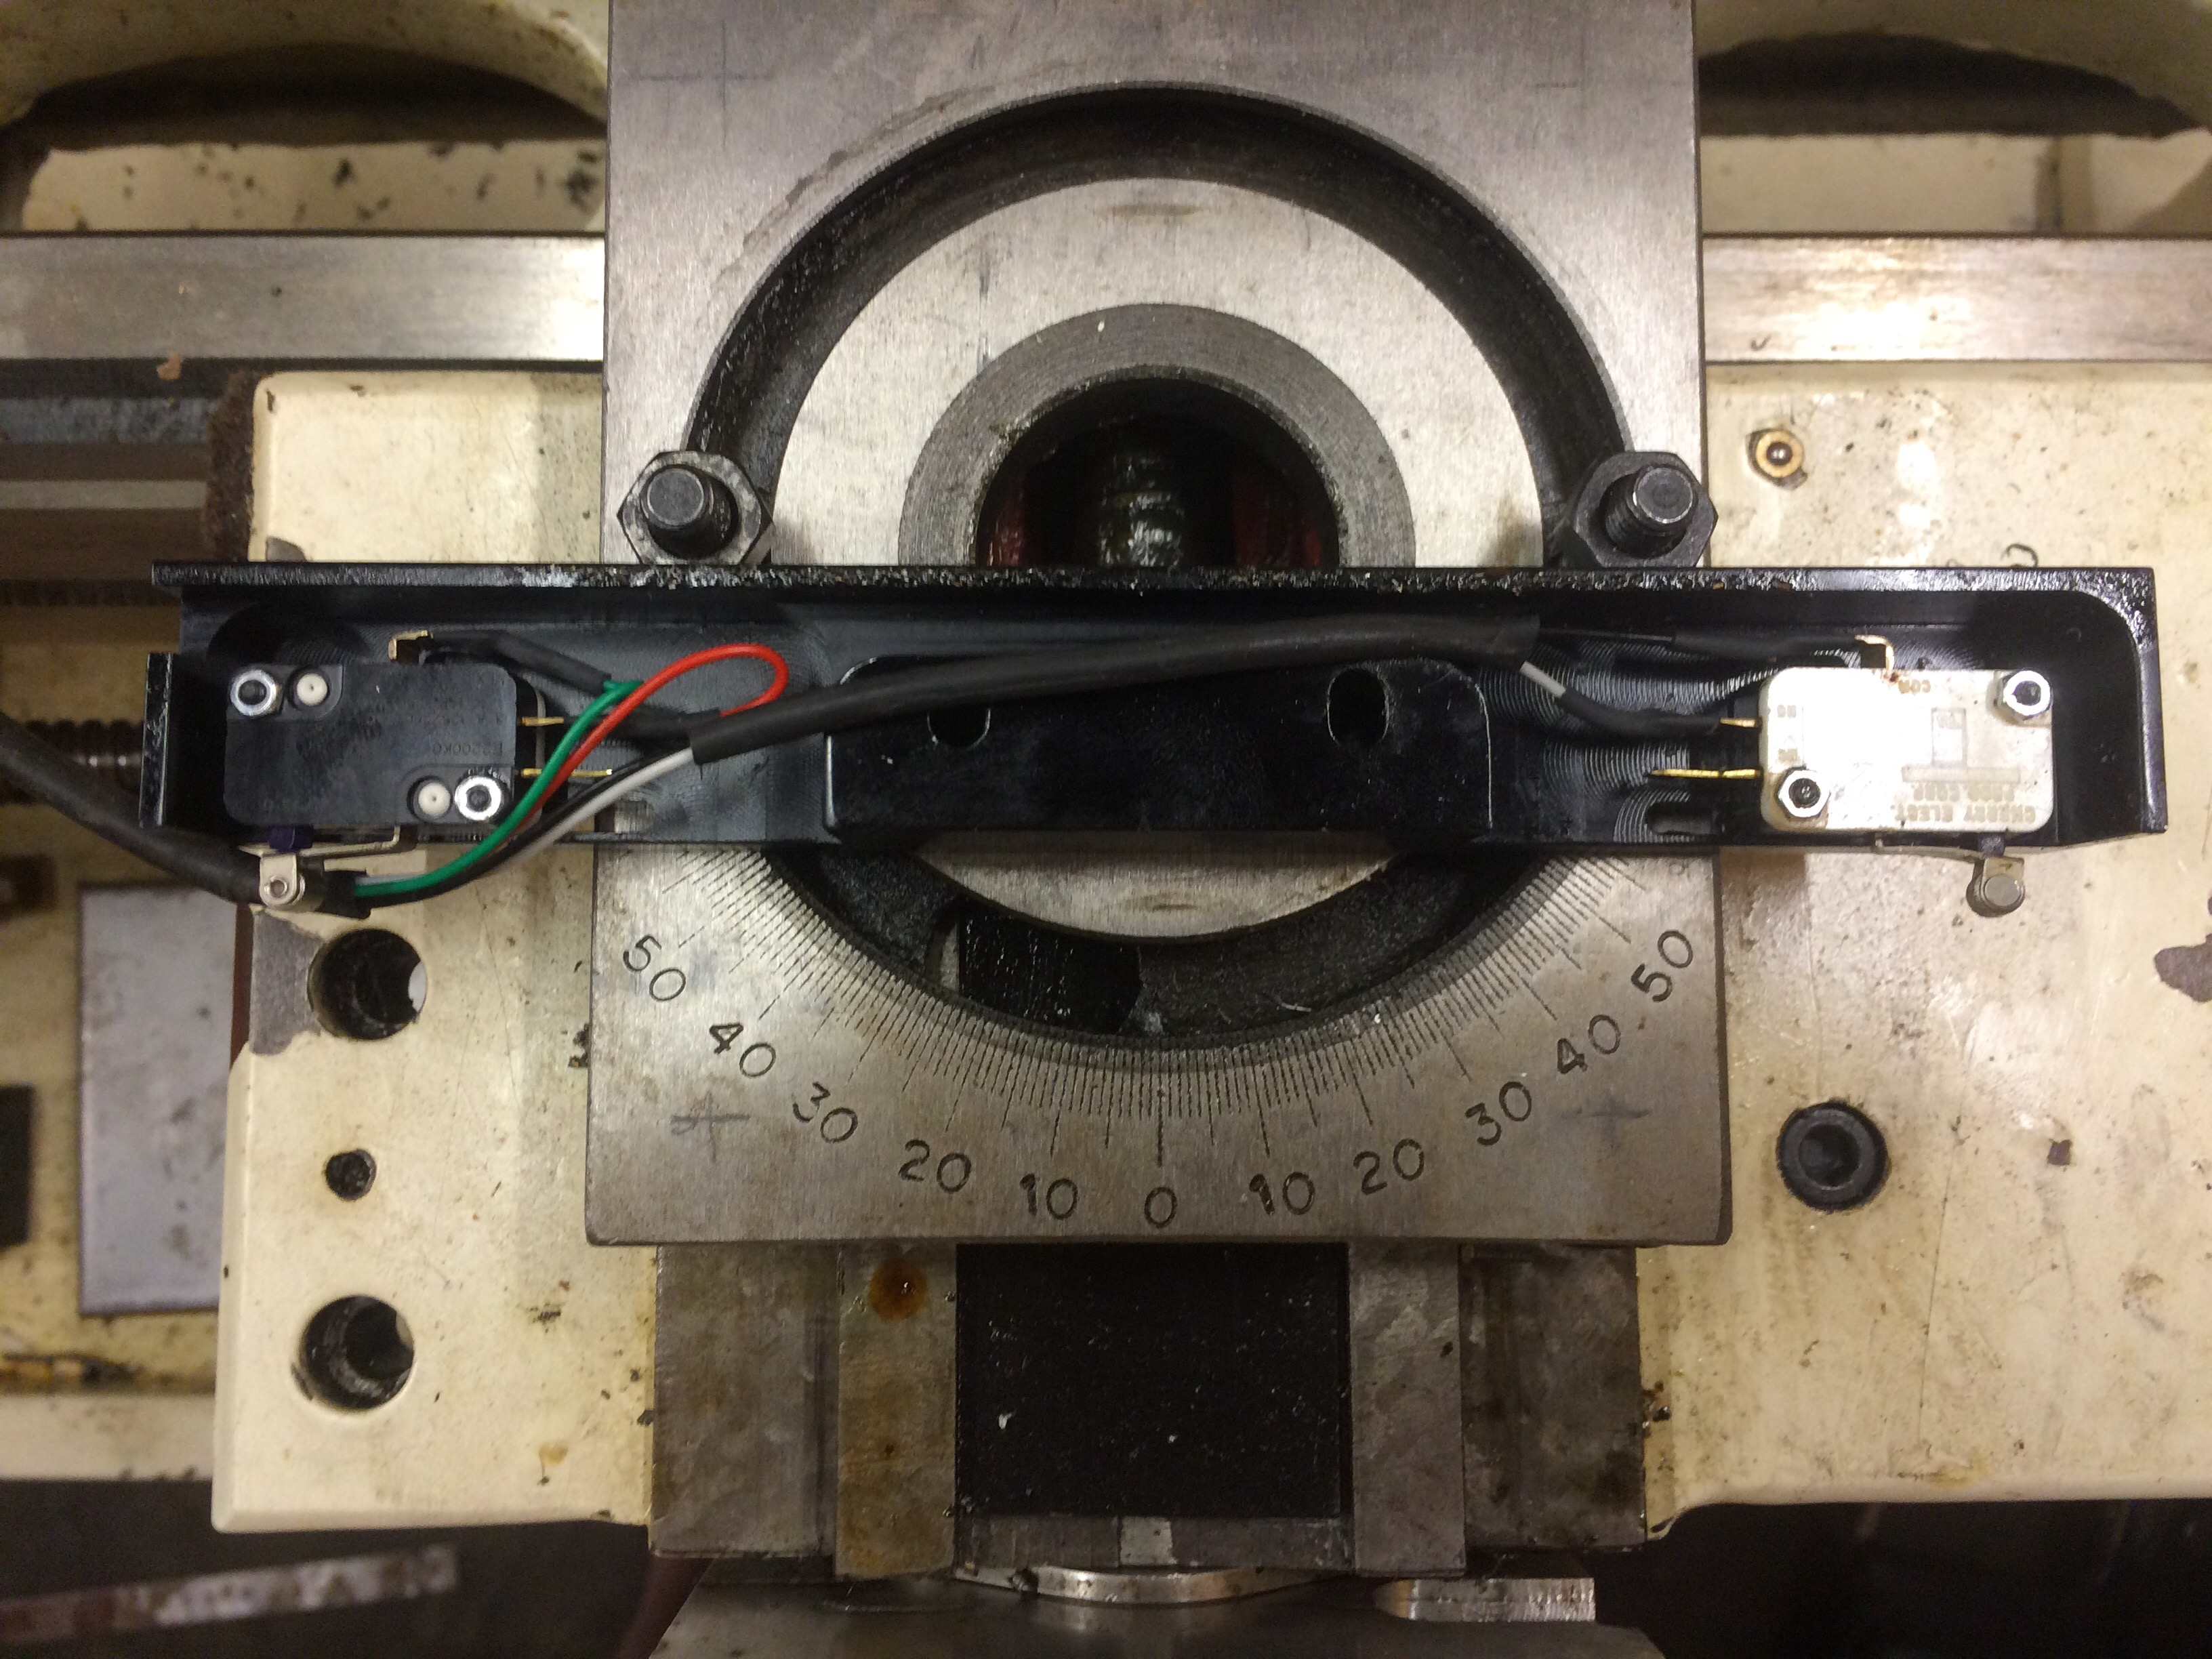
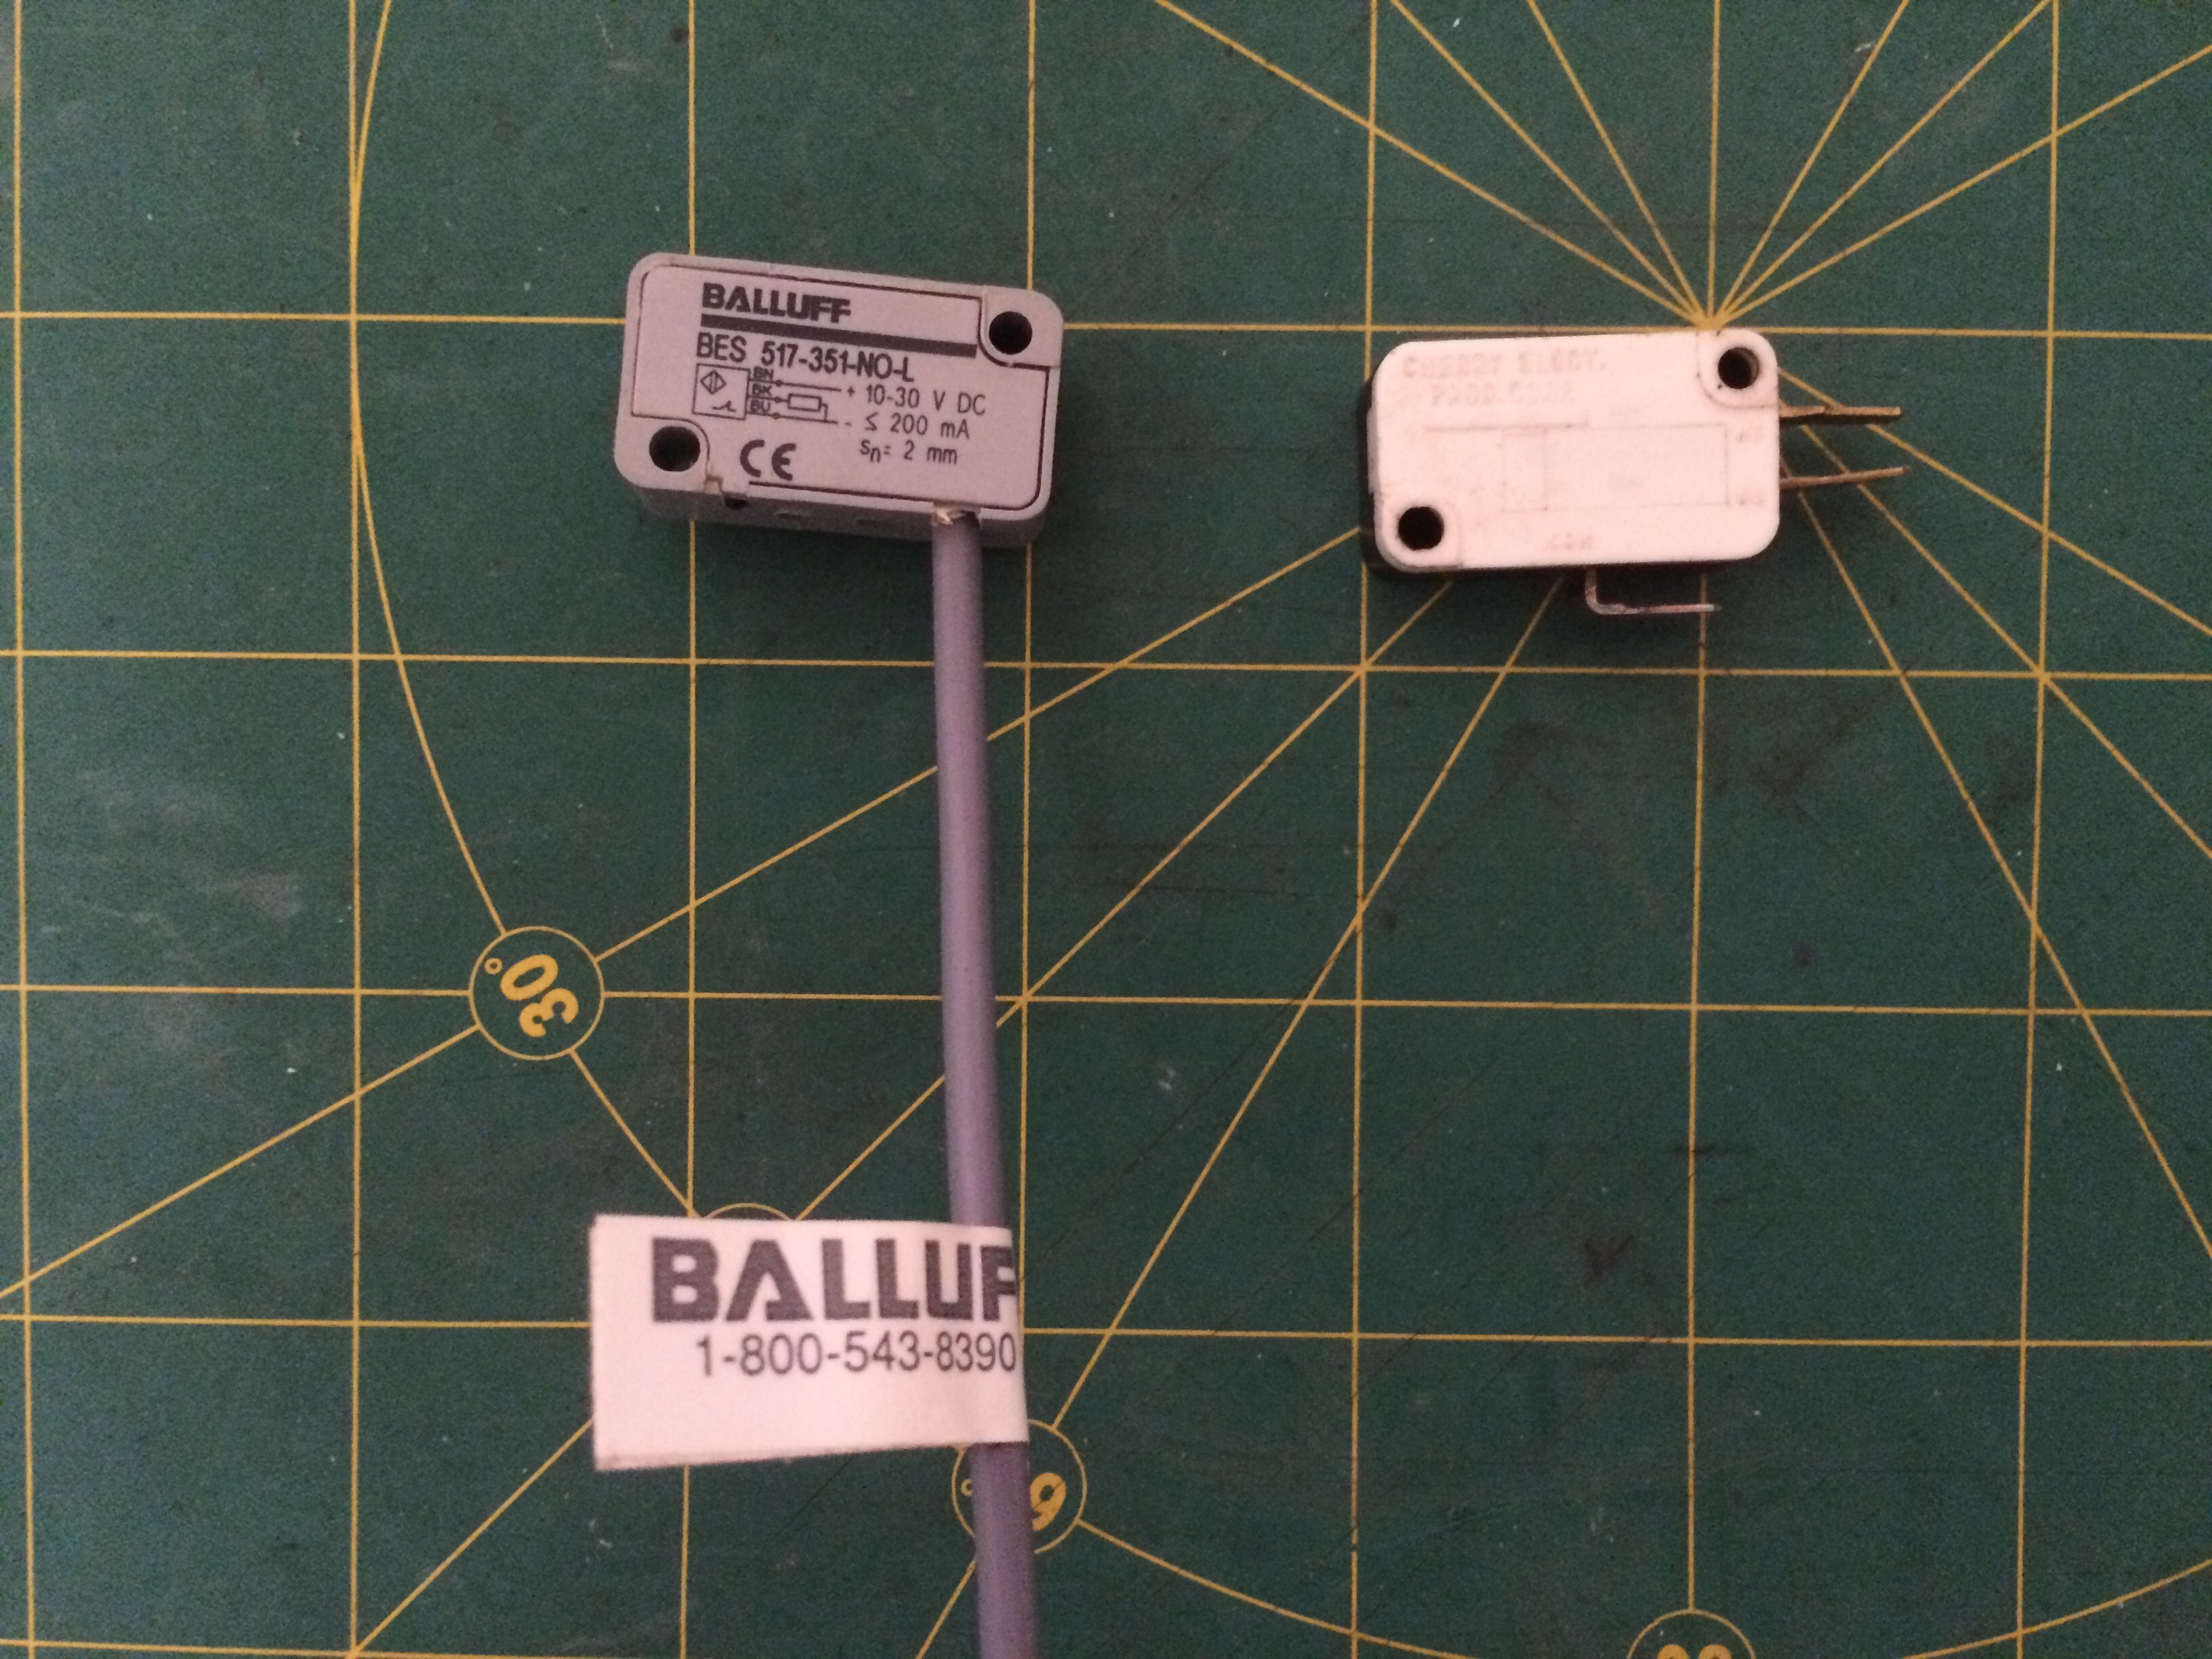
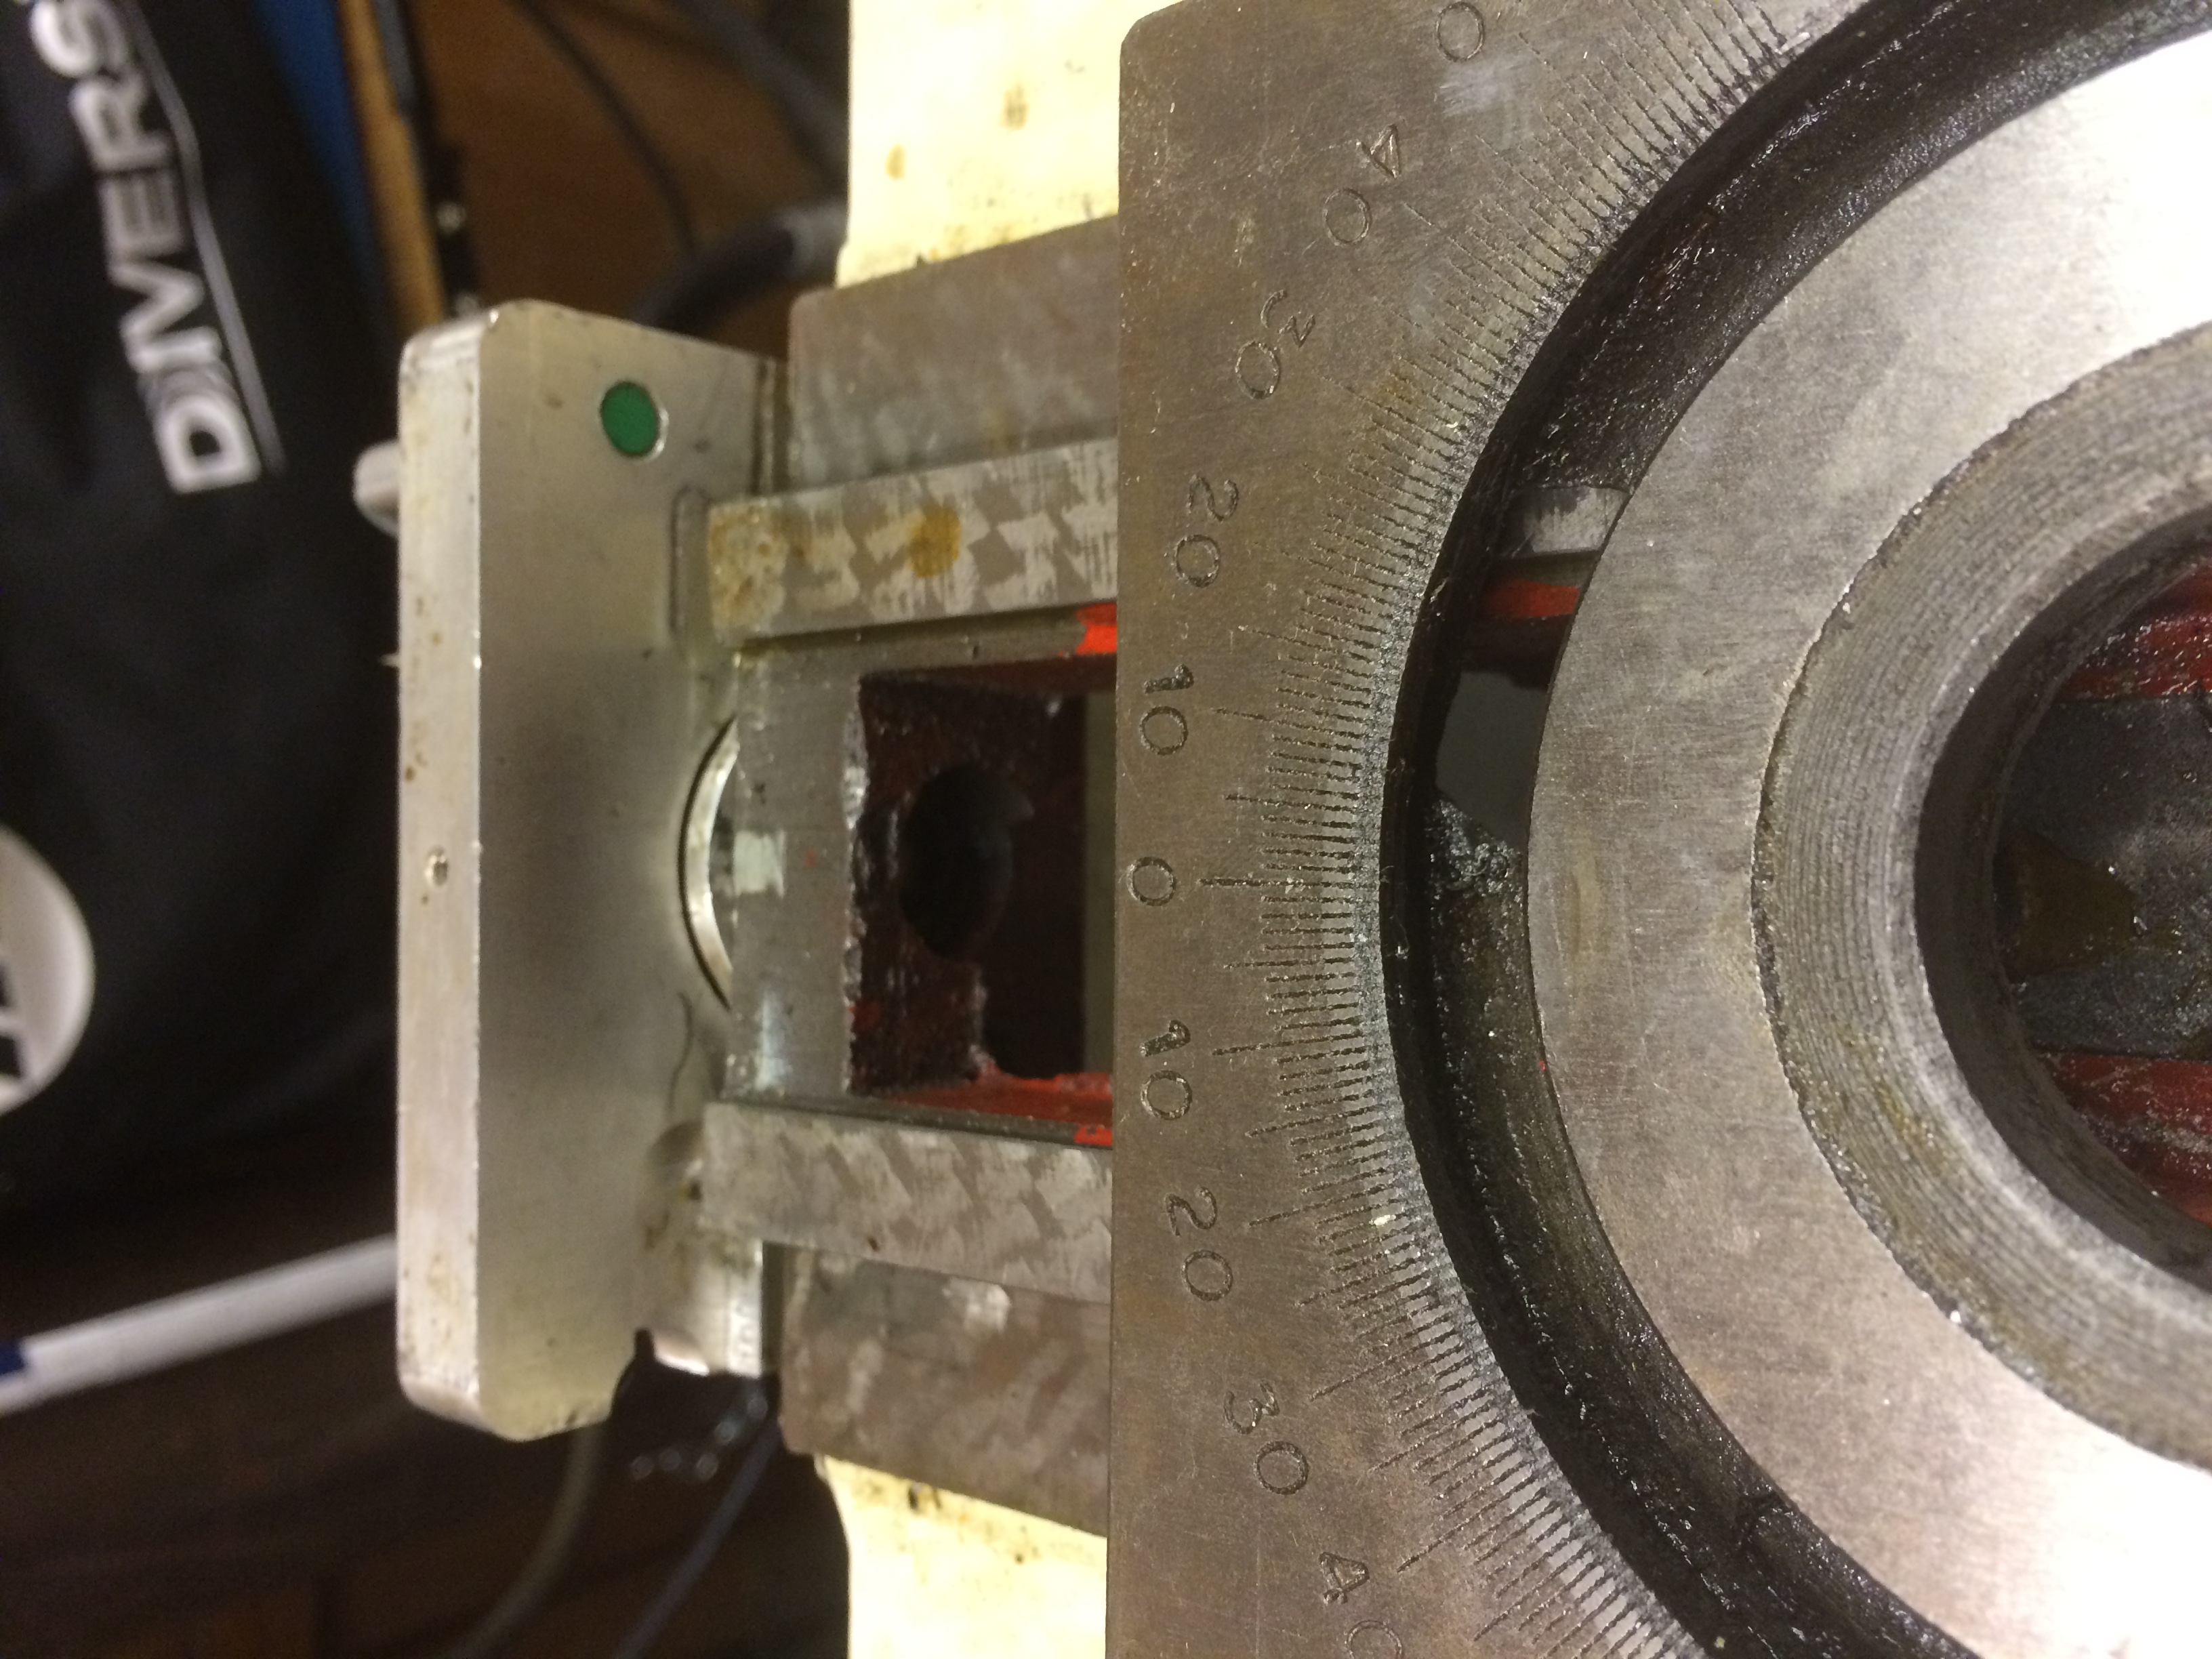
Broken switches can cause headache’s

Got the Limit Switches Working ( Will Be changing Switches Later) I was working on the Homing! 08/19 I Had the Homing working well till a Switch Failed Intermittently. Inspected all switches and For Sure Will be Changing Switches ASAP they all Seems all of them are brittle and cracked from years of prior use Factory ones are Mechanical Cherry E2200K0 I Will be switching them to Balluff BES 517-351 NC PNO Proximity Sensors these are the only ones I could find that are shielded and a 2mm sense distance “most are 5mm” and Mounted in the 10.5 X 30 X 16.5mm Mounts from the retro fit kit. They should arrive Friday 08/26.
Some Balluff BES 517-351 Arrived Today.
Got to working setting up the Hitachi WJ200 VFD on the spindle.
WJ200 Setup.
Short Bar L Connected To PLC
A001 Set to 01 (A001: 01 Control Terminal)
A002 Set to 01 (A002: 01 Control Terminal)
“Set your Max Freq to Your Motor/Machine This Will Vary By Machine & Motor”
7I76 Card TB4 WJ200 VFD
Pin 1 SPINDLE- Pin L
Pin 2 SPINDLE OUT Pin O
Pin 3 SPINDLE+ Pin H
7I76 Card TB6
Spin FWD Output 00 Pin 1 (Logic Input)
Spin Rev Output 01 Pin 2 (Logic Input)
GND To Short Bar
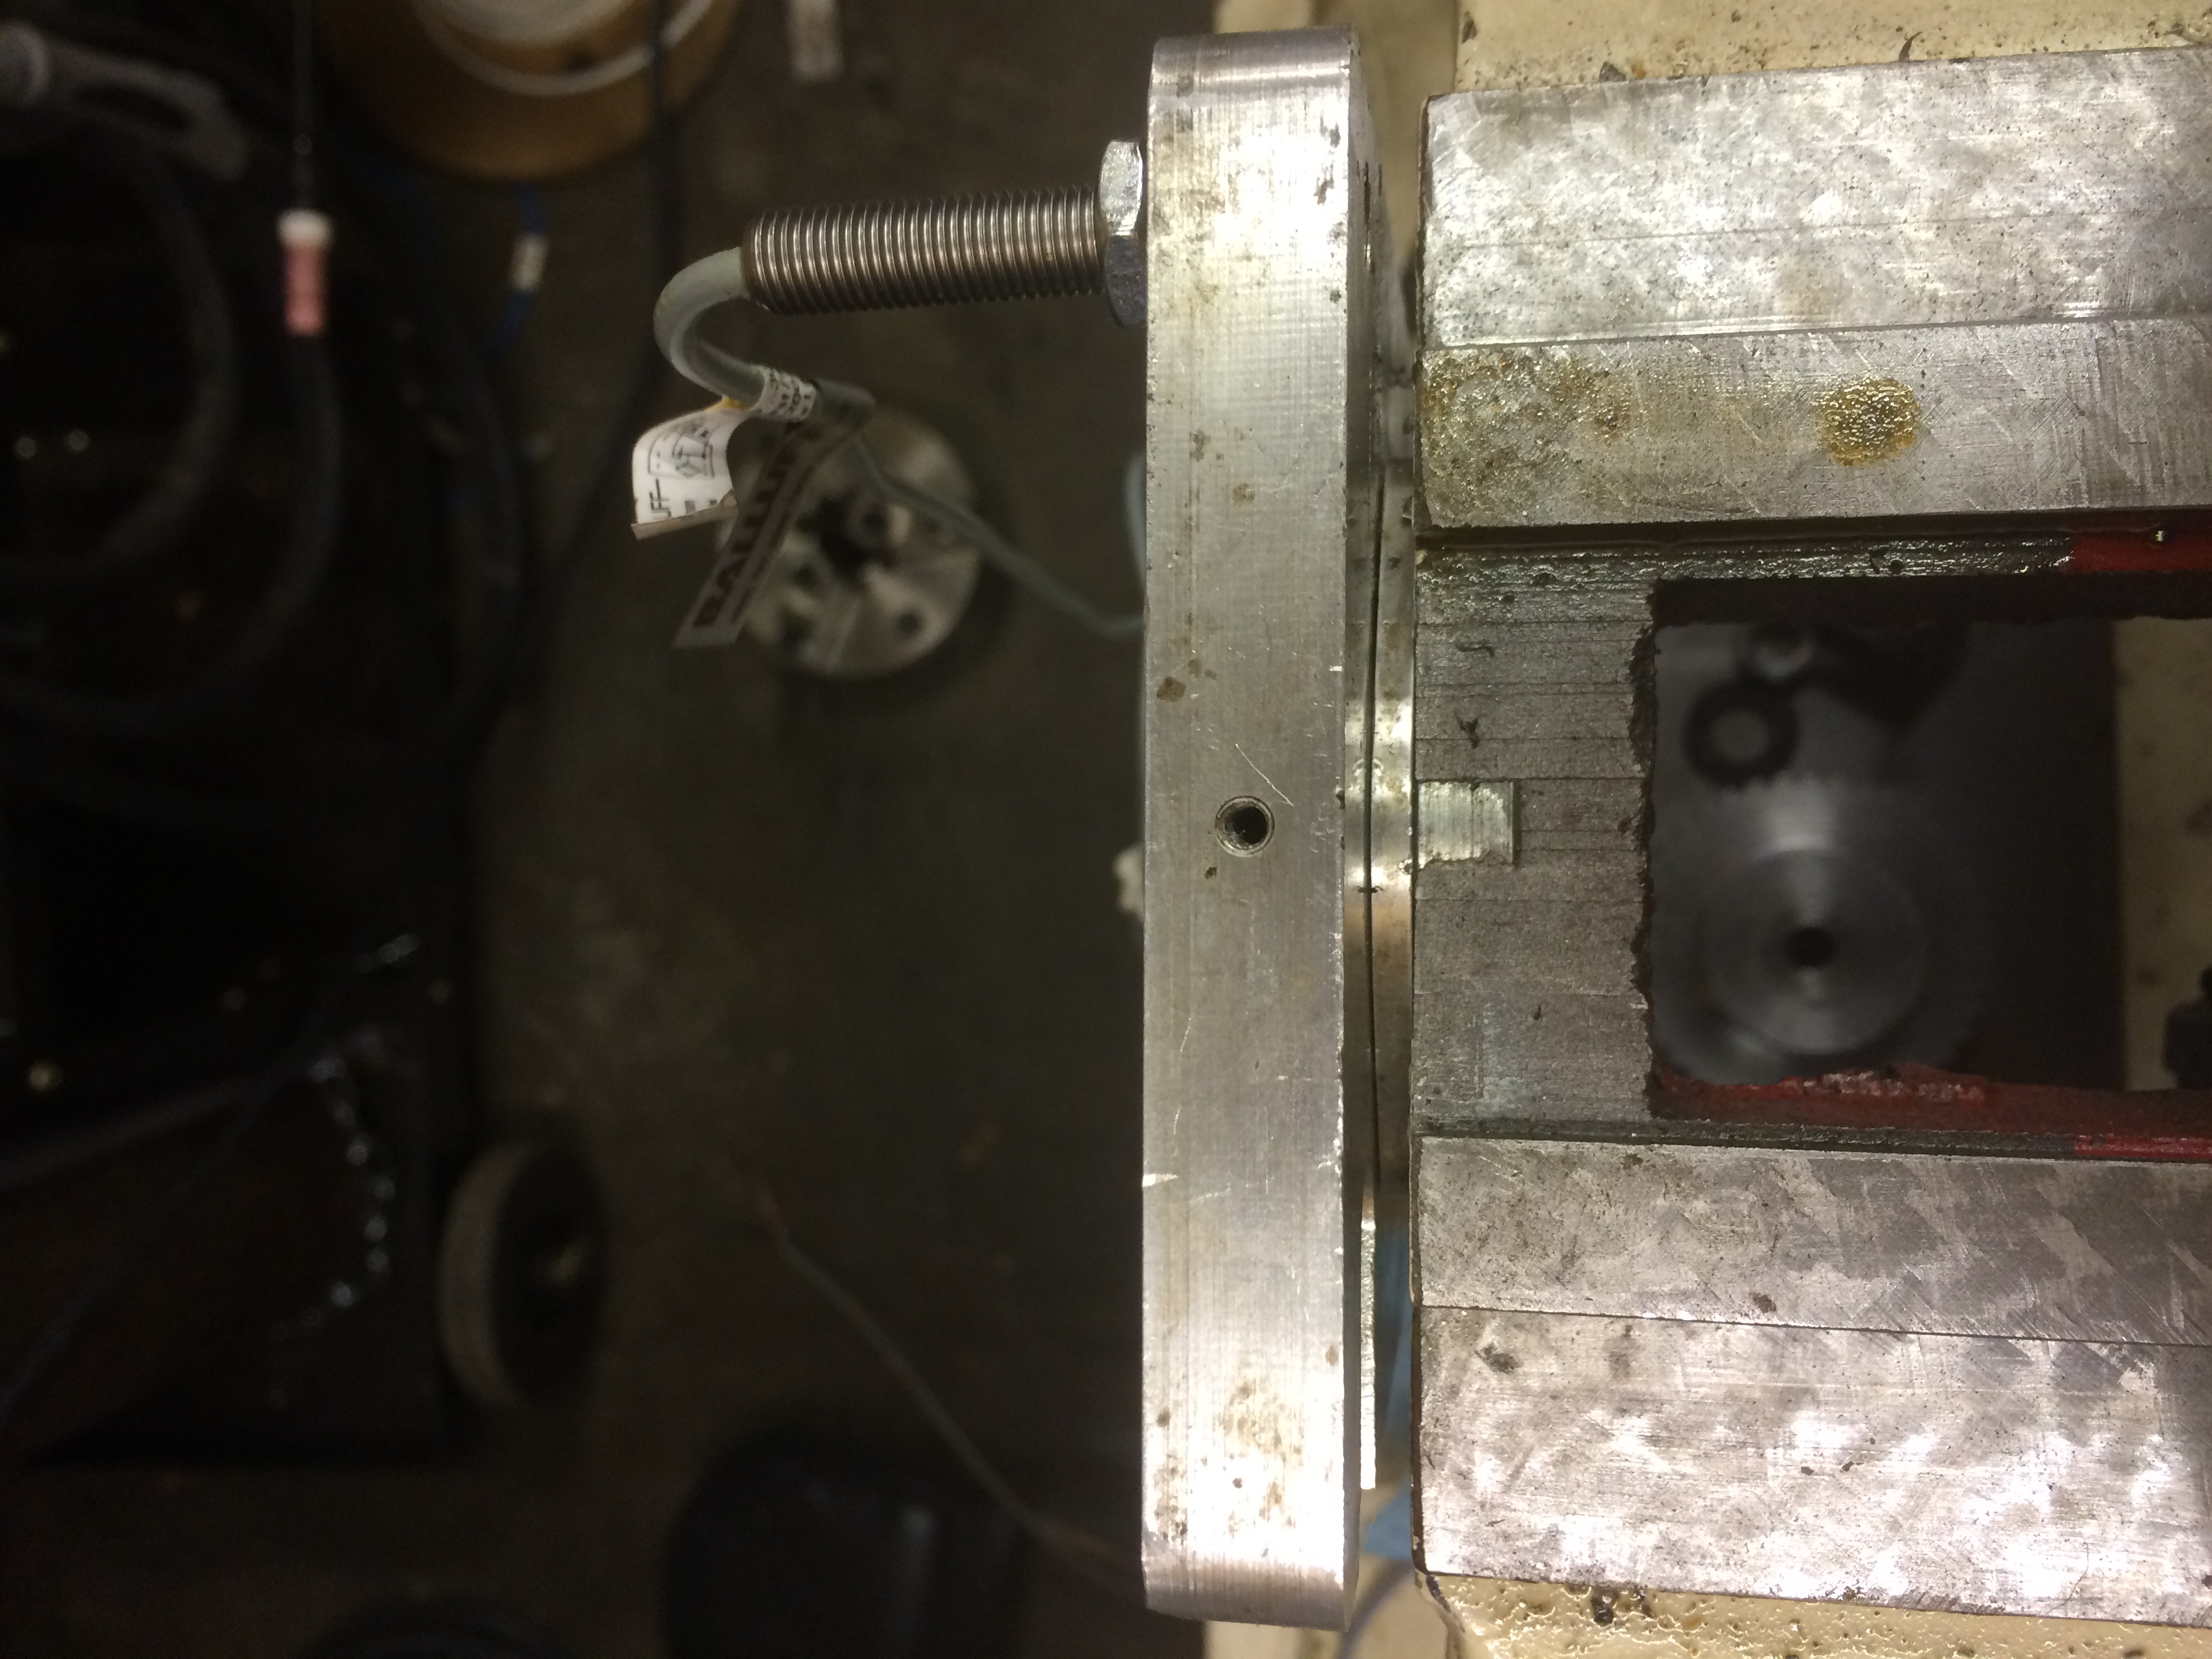
Next Is The Encoder if my Molex Pins Ever Arrive! 08/20 Molex Connectors Arrived!

08/20 24V 5V Power Supply Arrived Will be a Perfect Fit to Replace the Factory 12V / 5V.

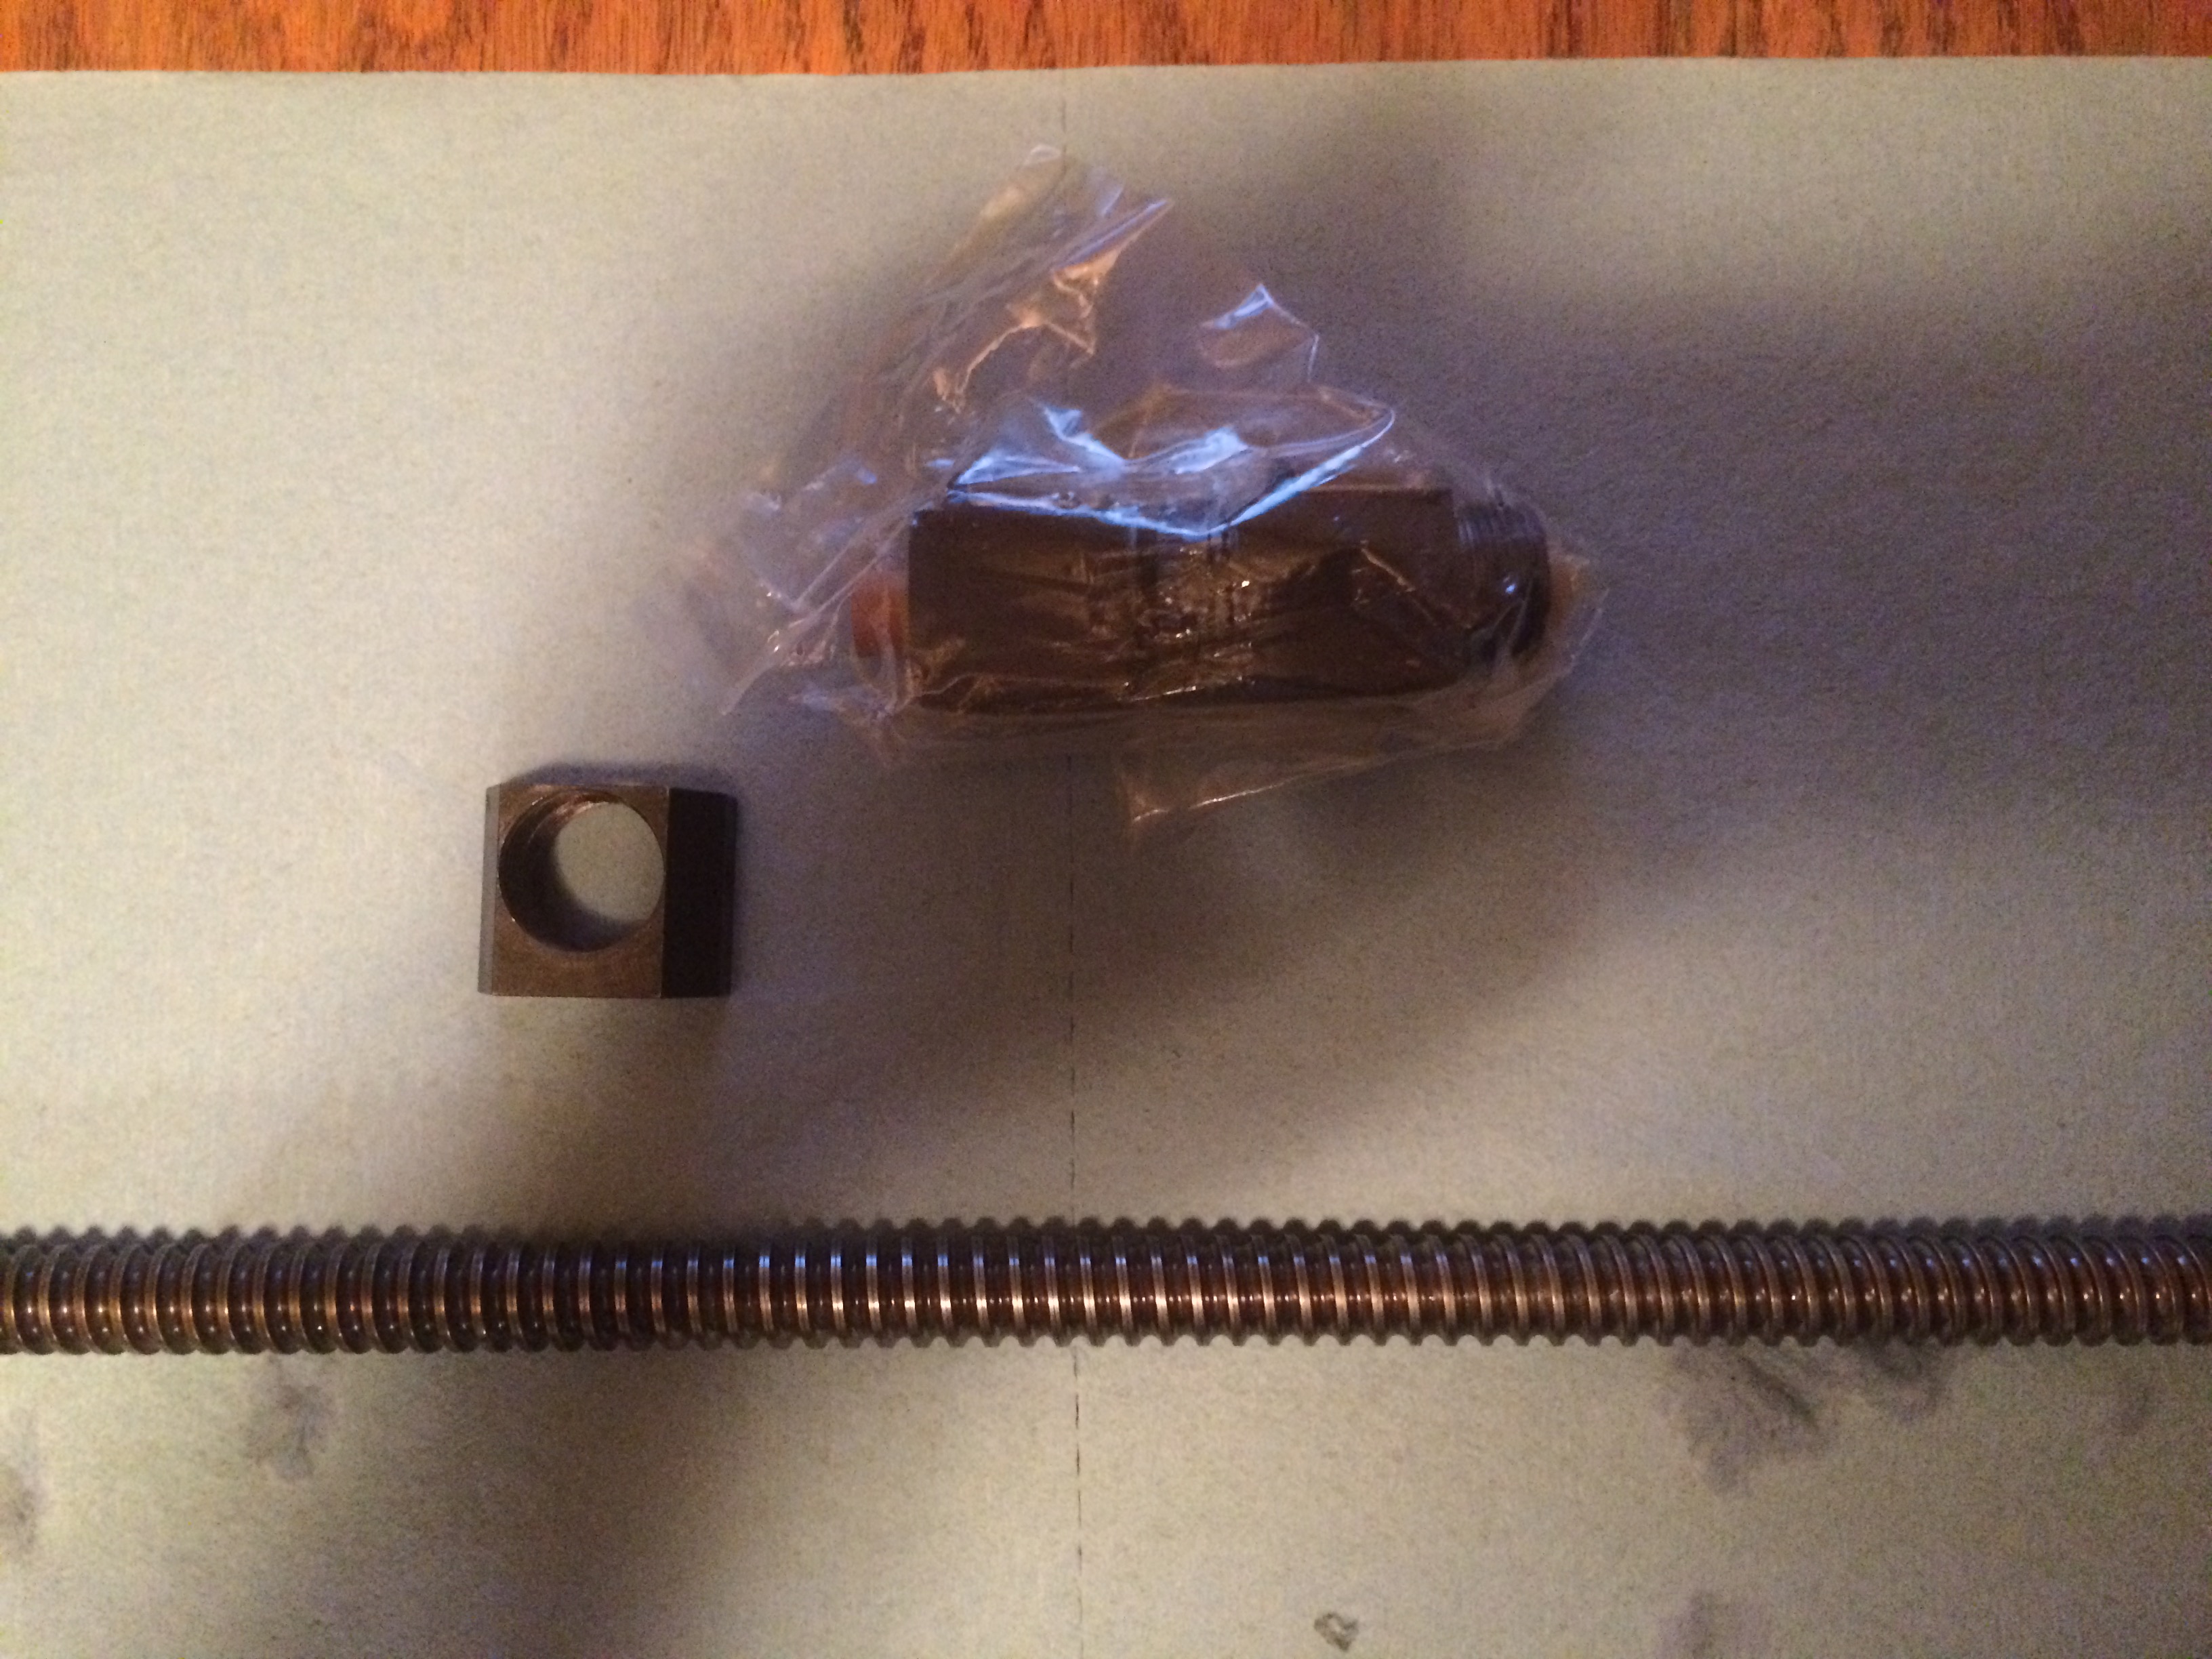
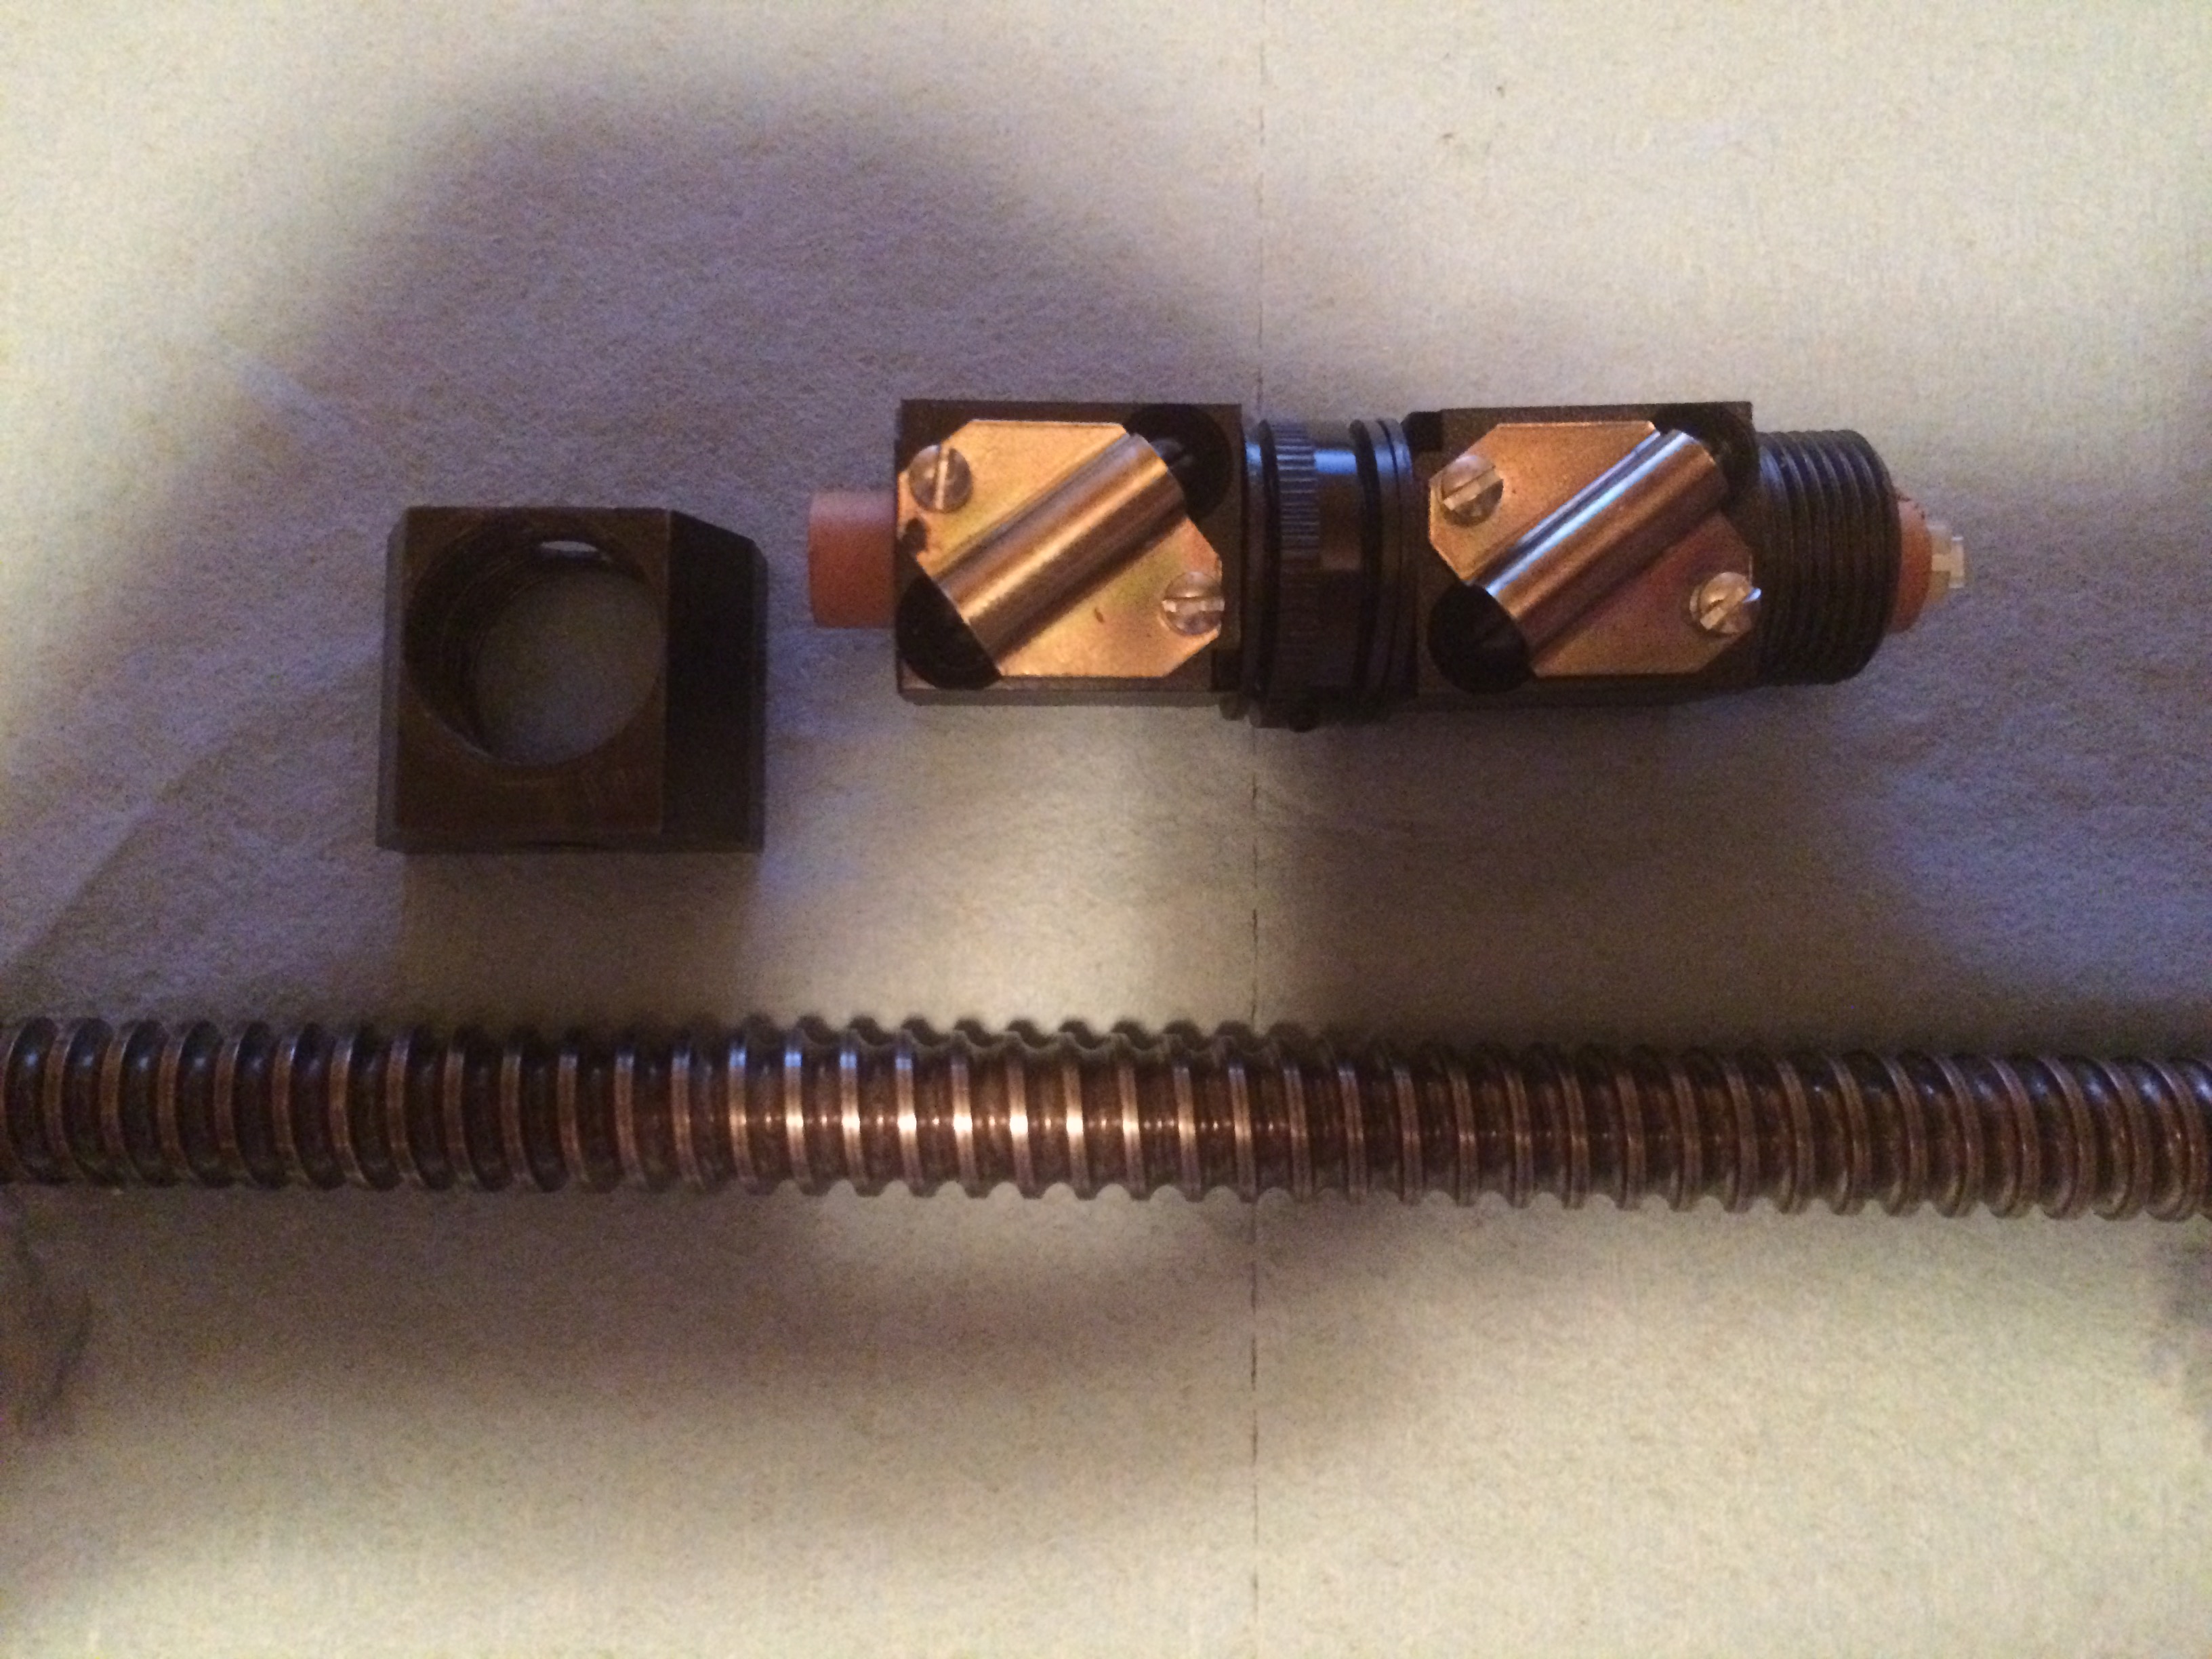
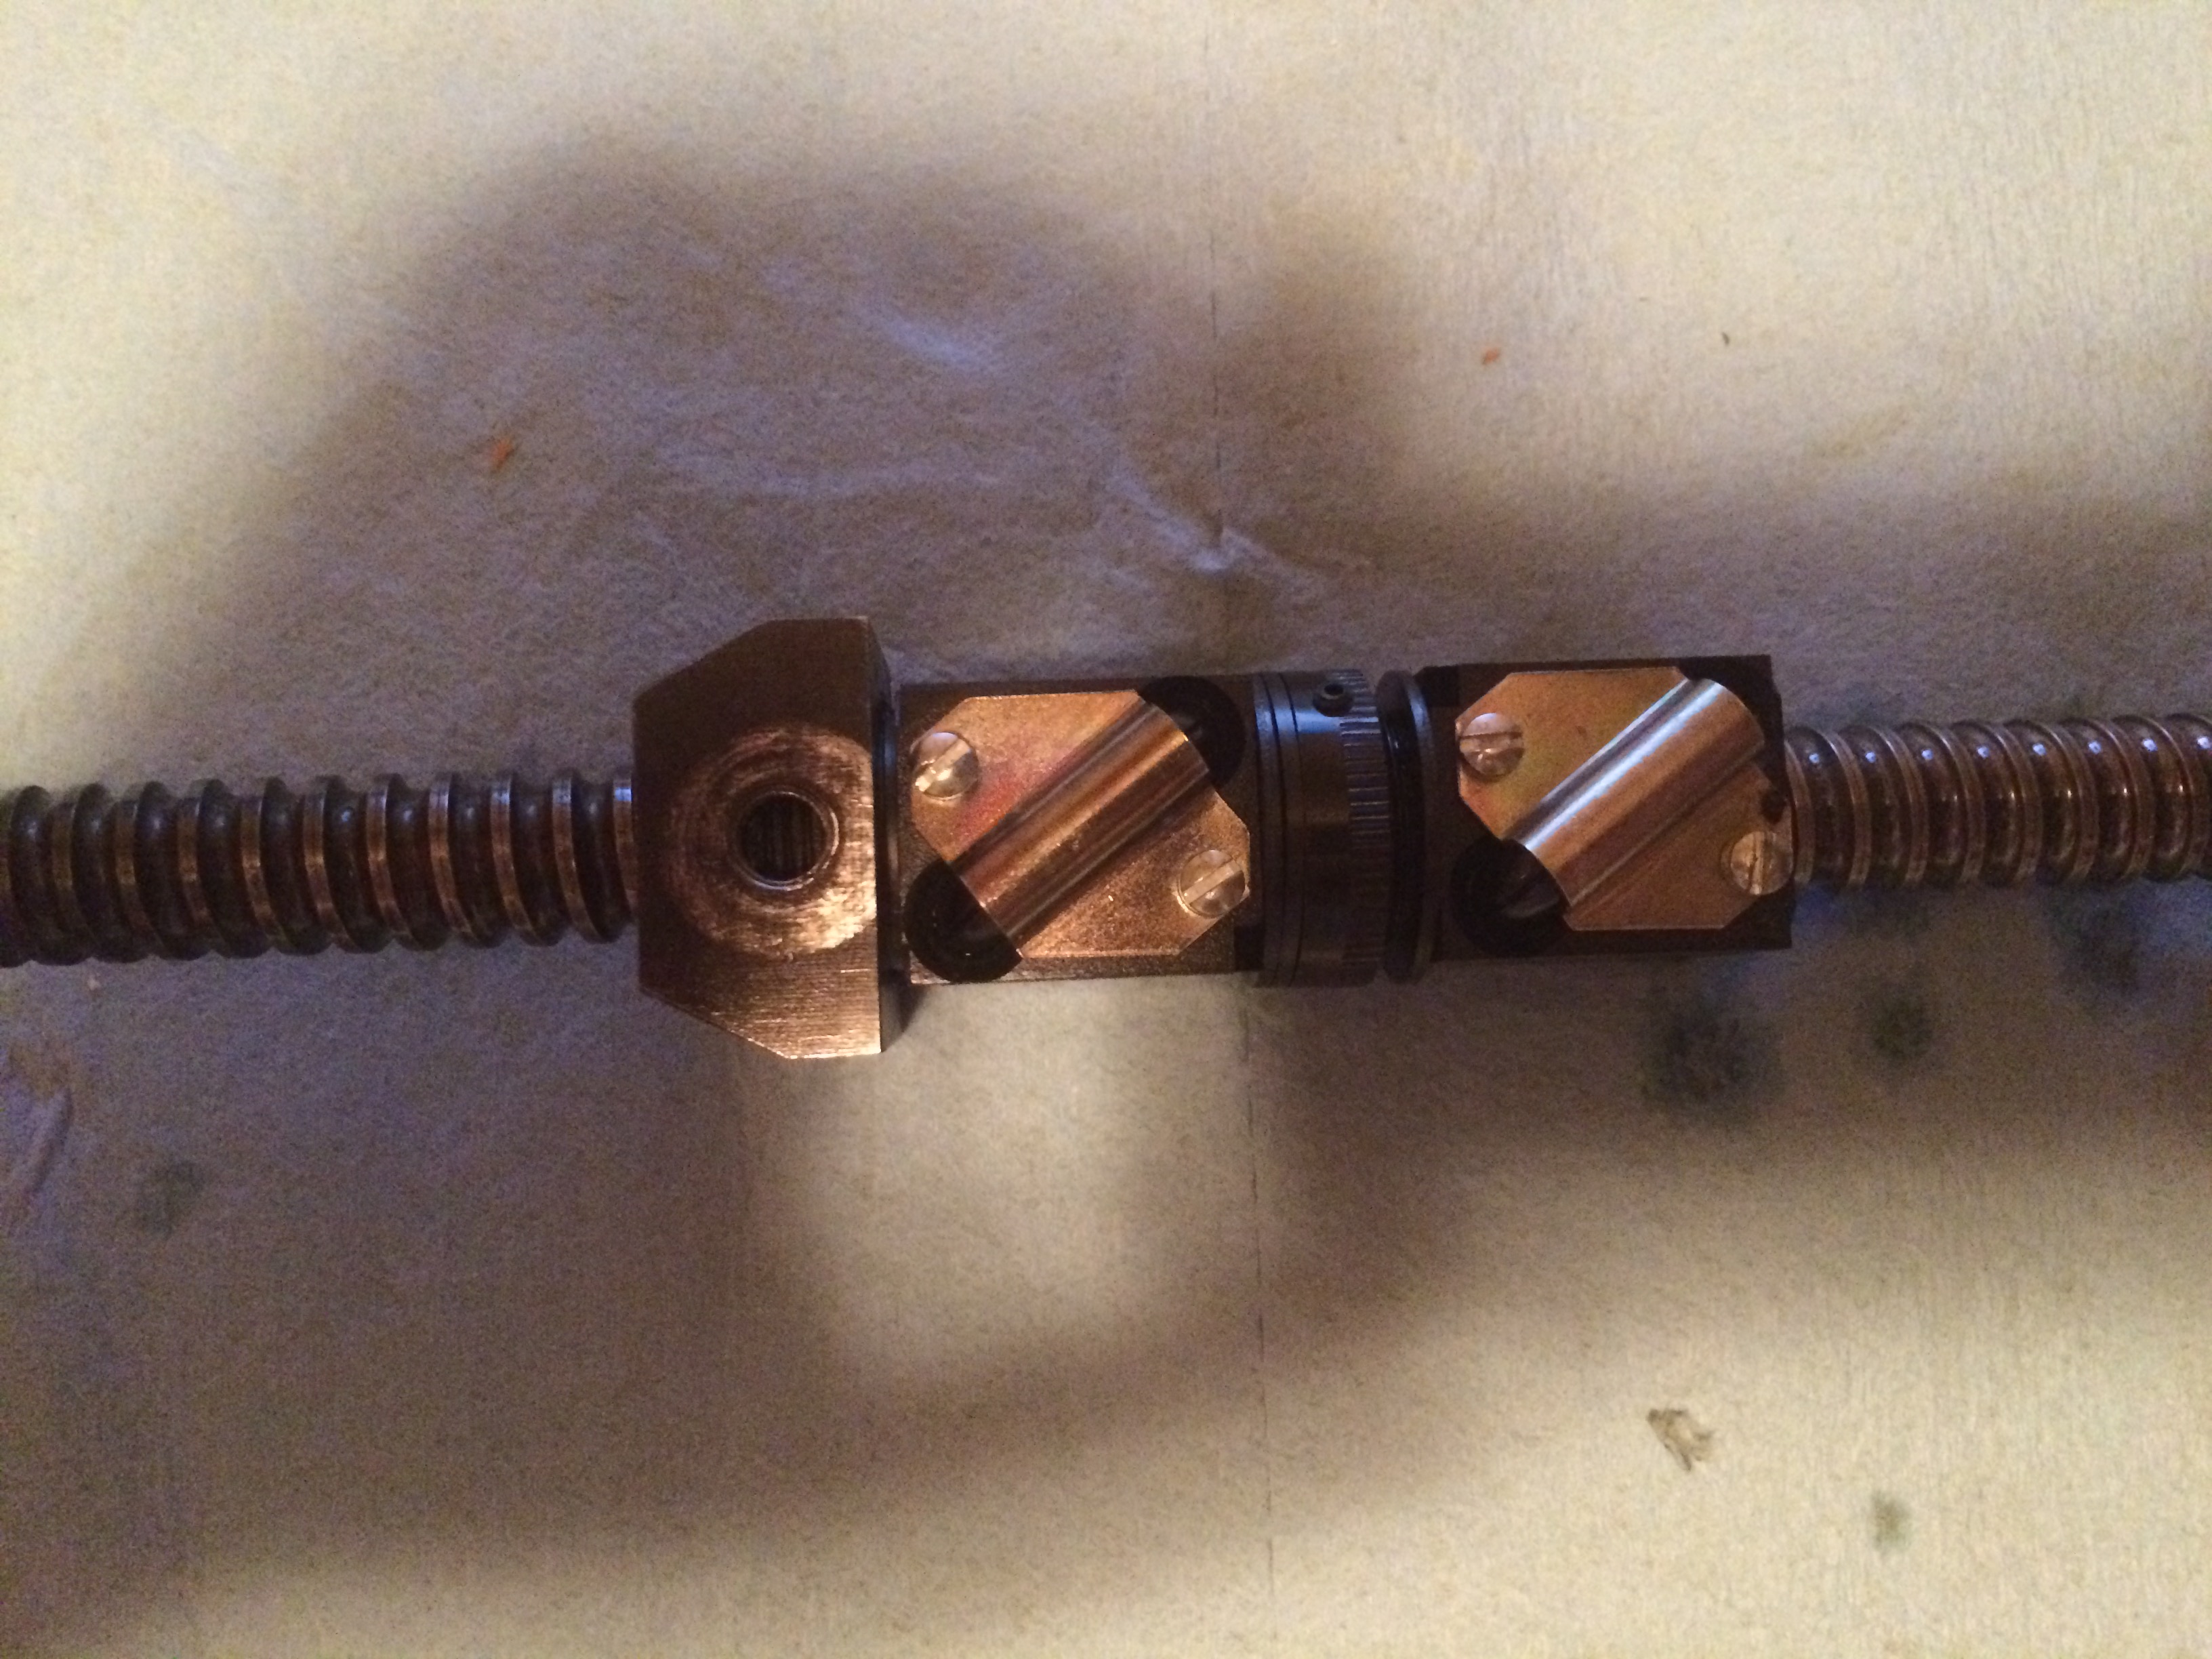
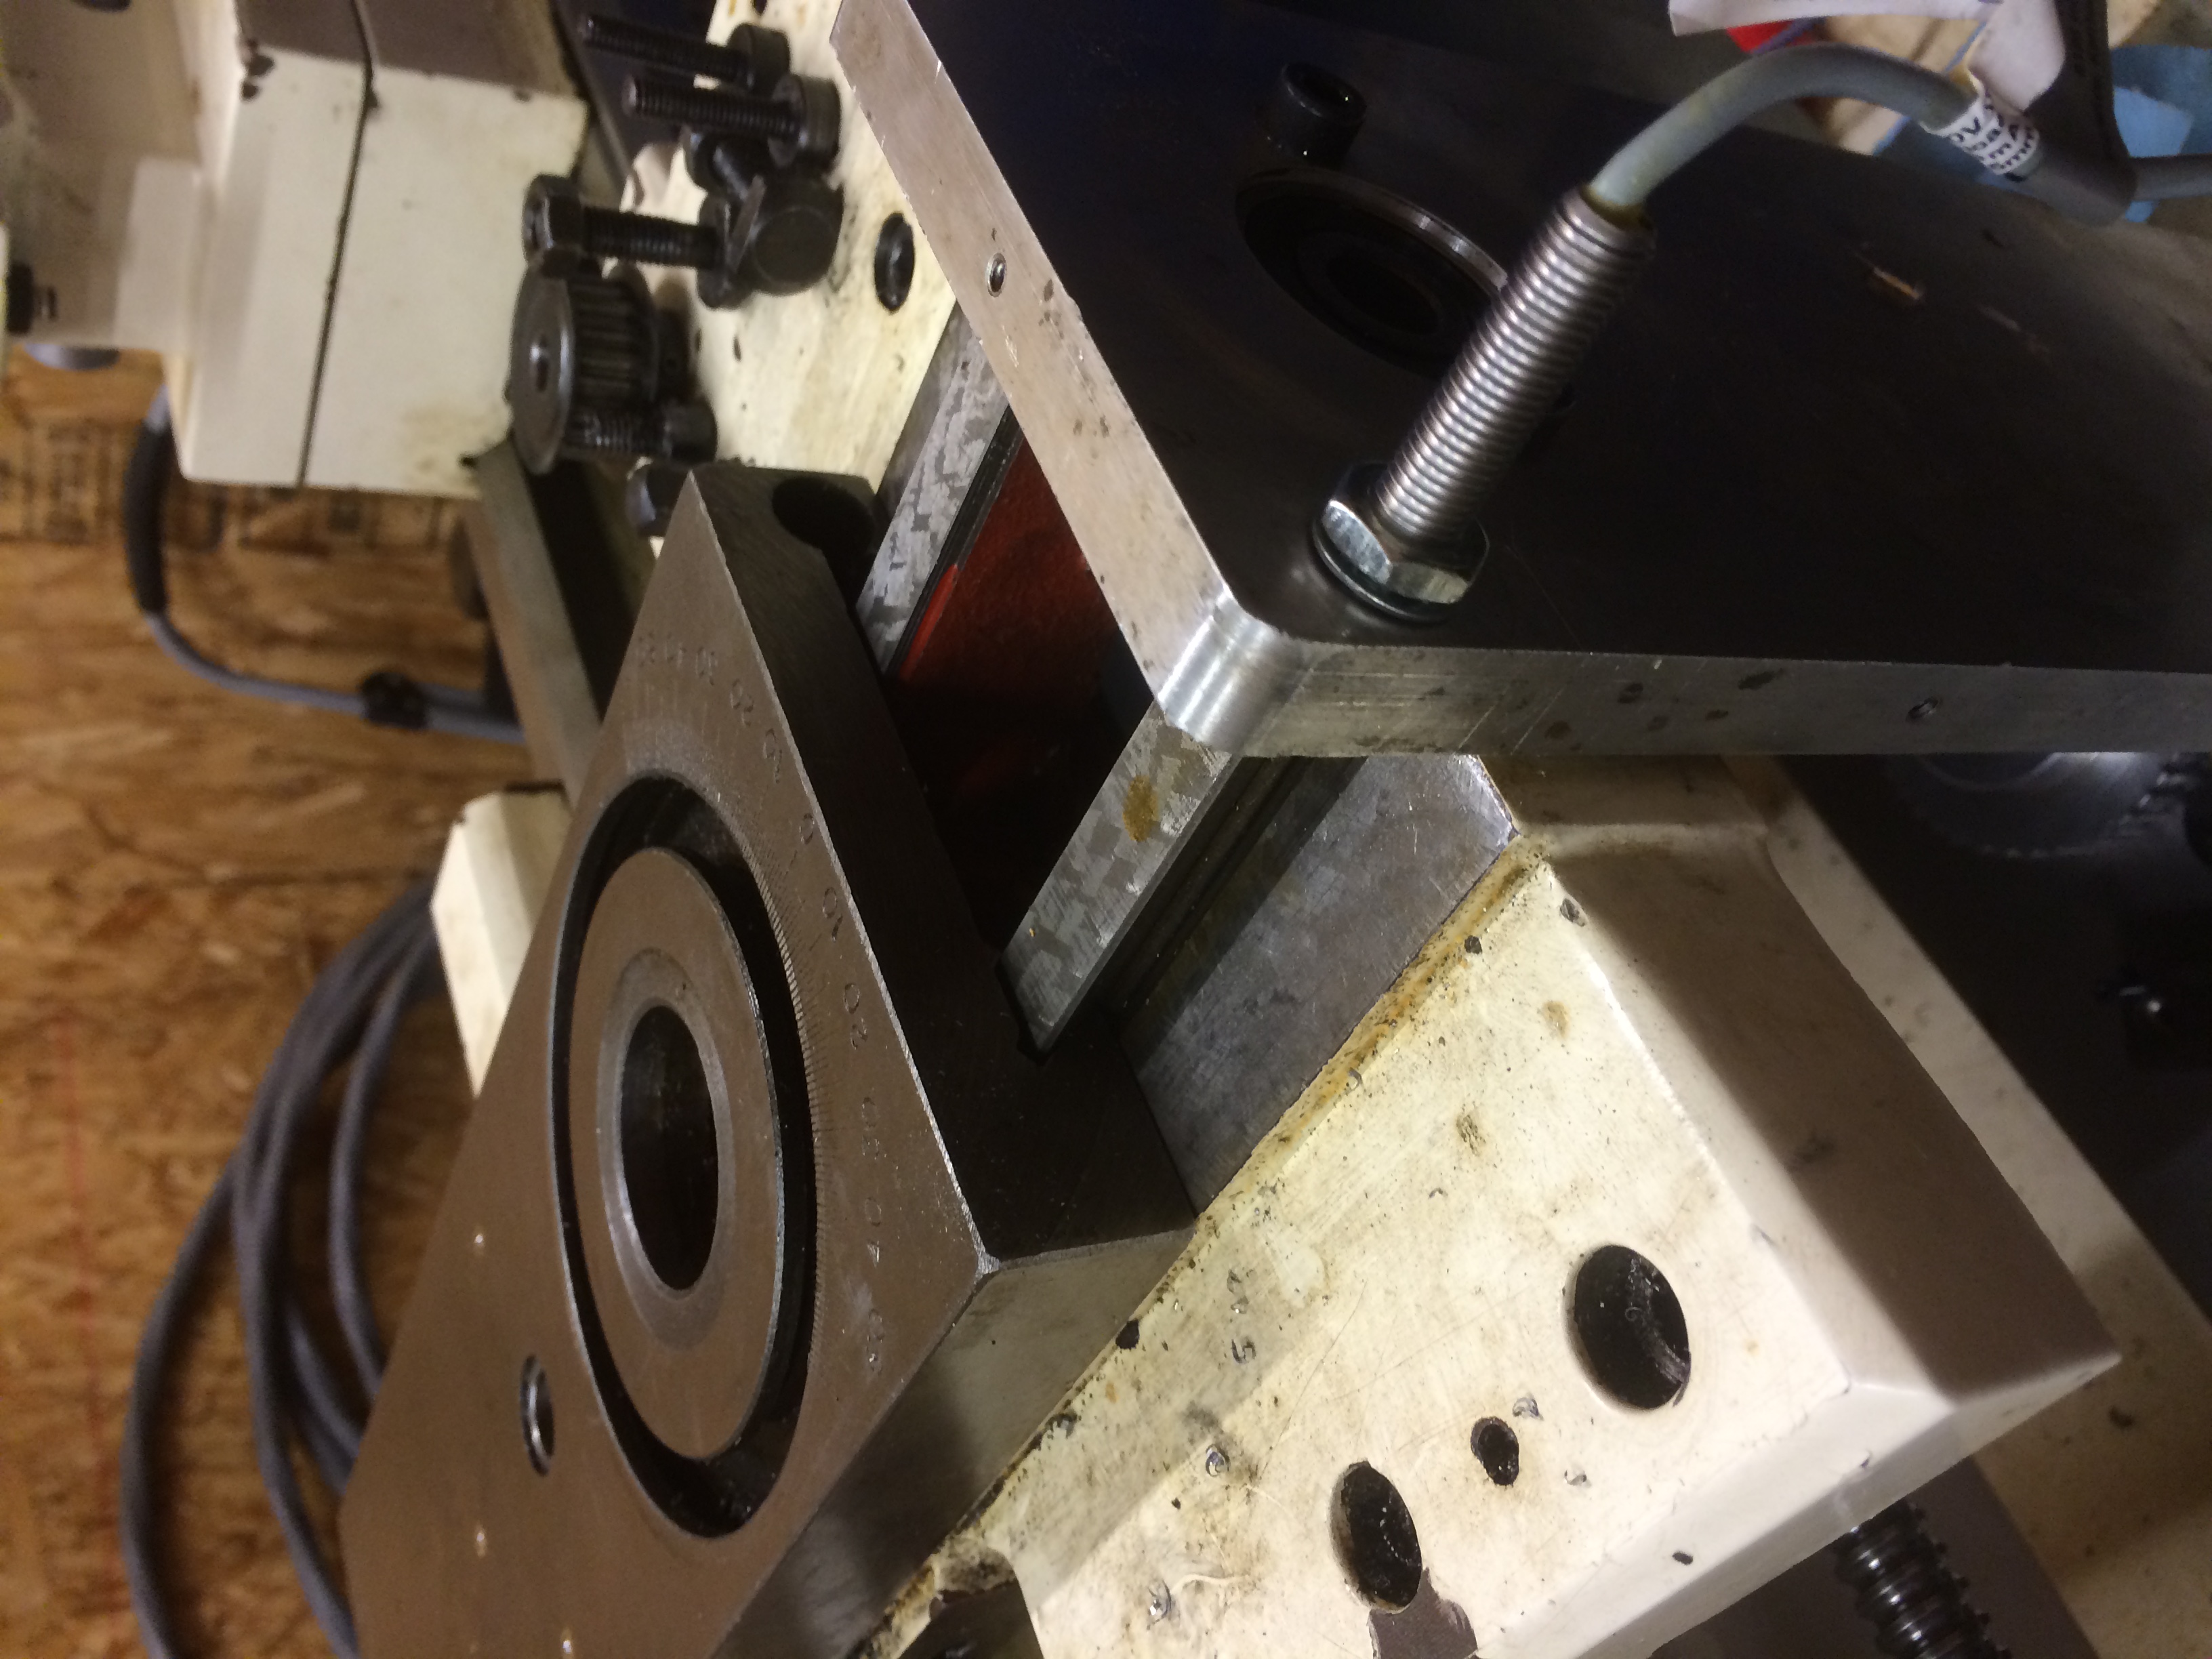
Got my ball nut…

Had some time today, I got the Nut Installed on the Screw FYI Screw length is 18 3/4″ Long.
I also got the Motor Mount Removed, Drilled and Tapped 8mm-1 For The Proximity Sensor Limit Home Switch. To Bad The Switch Arrived With the LED Broken/Missing. Seem to still function but ordering another to be sure it will work 100%.
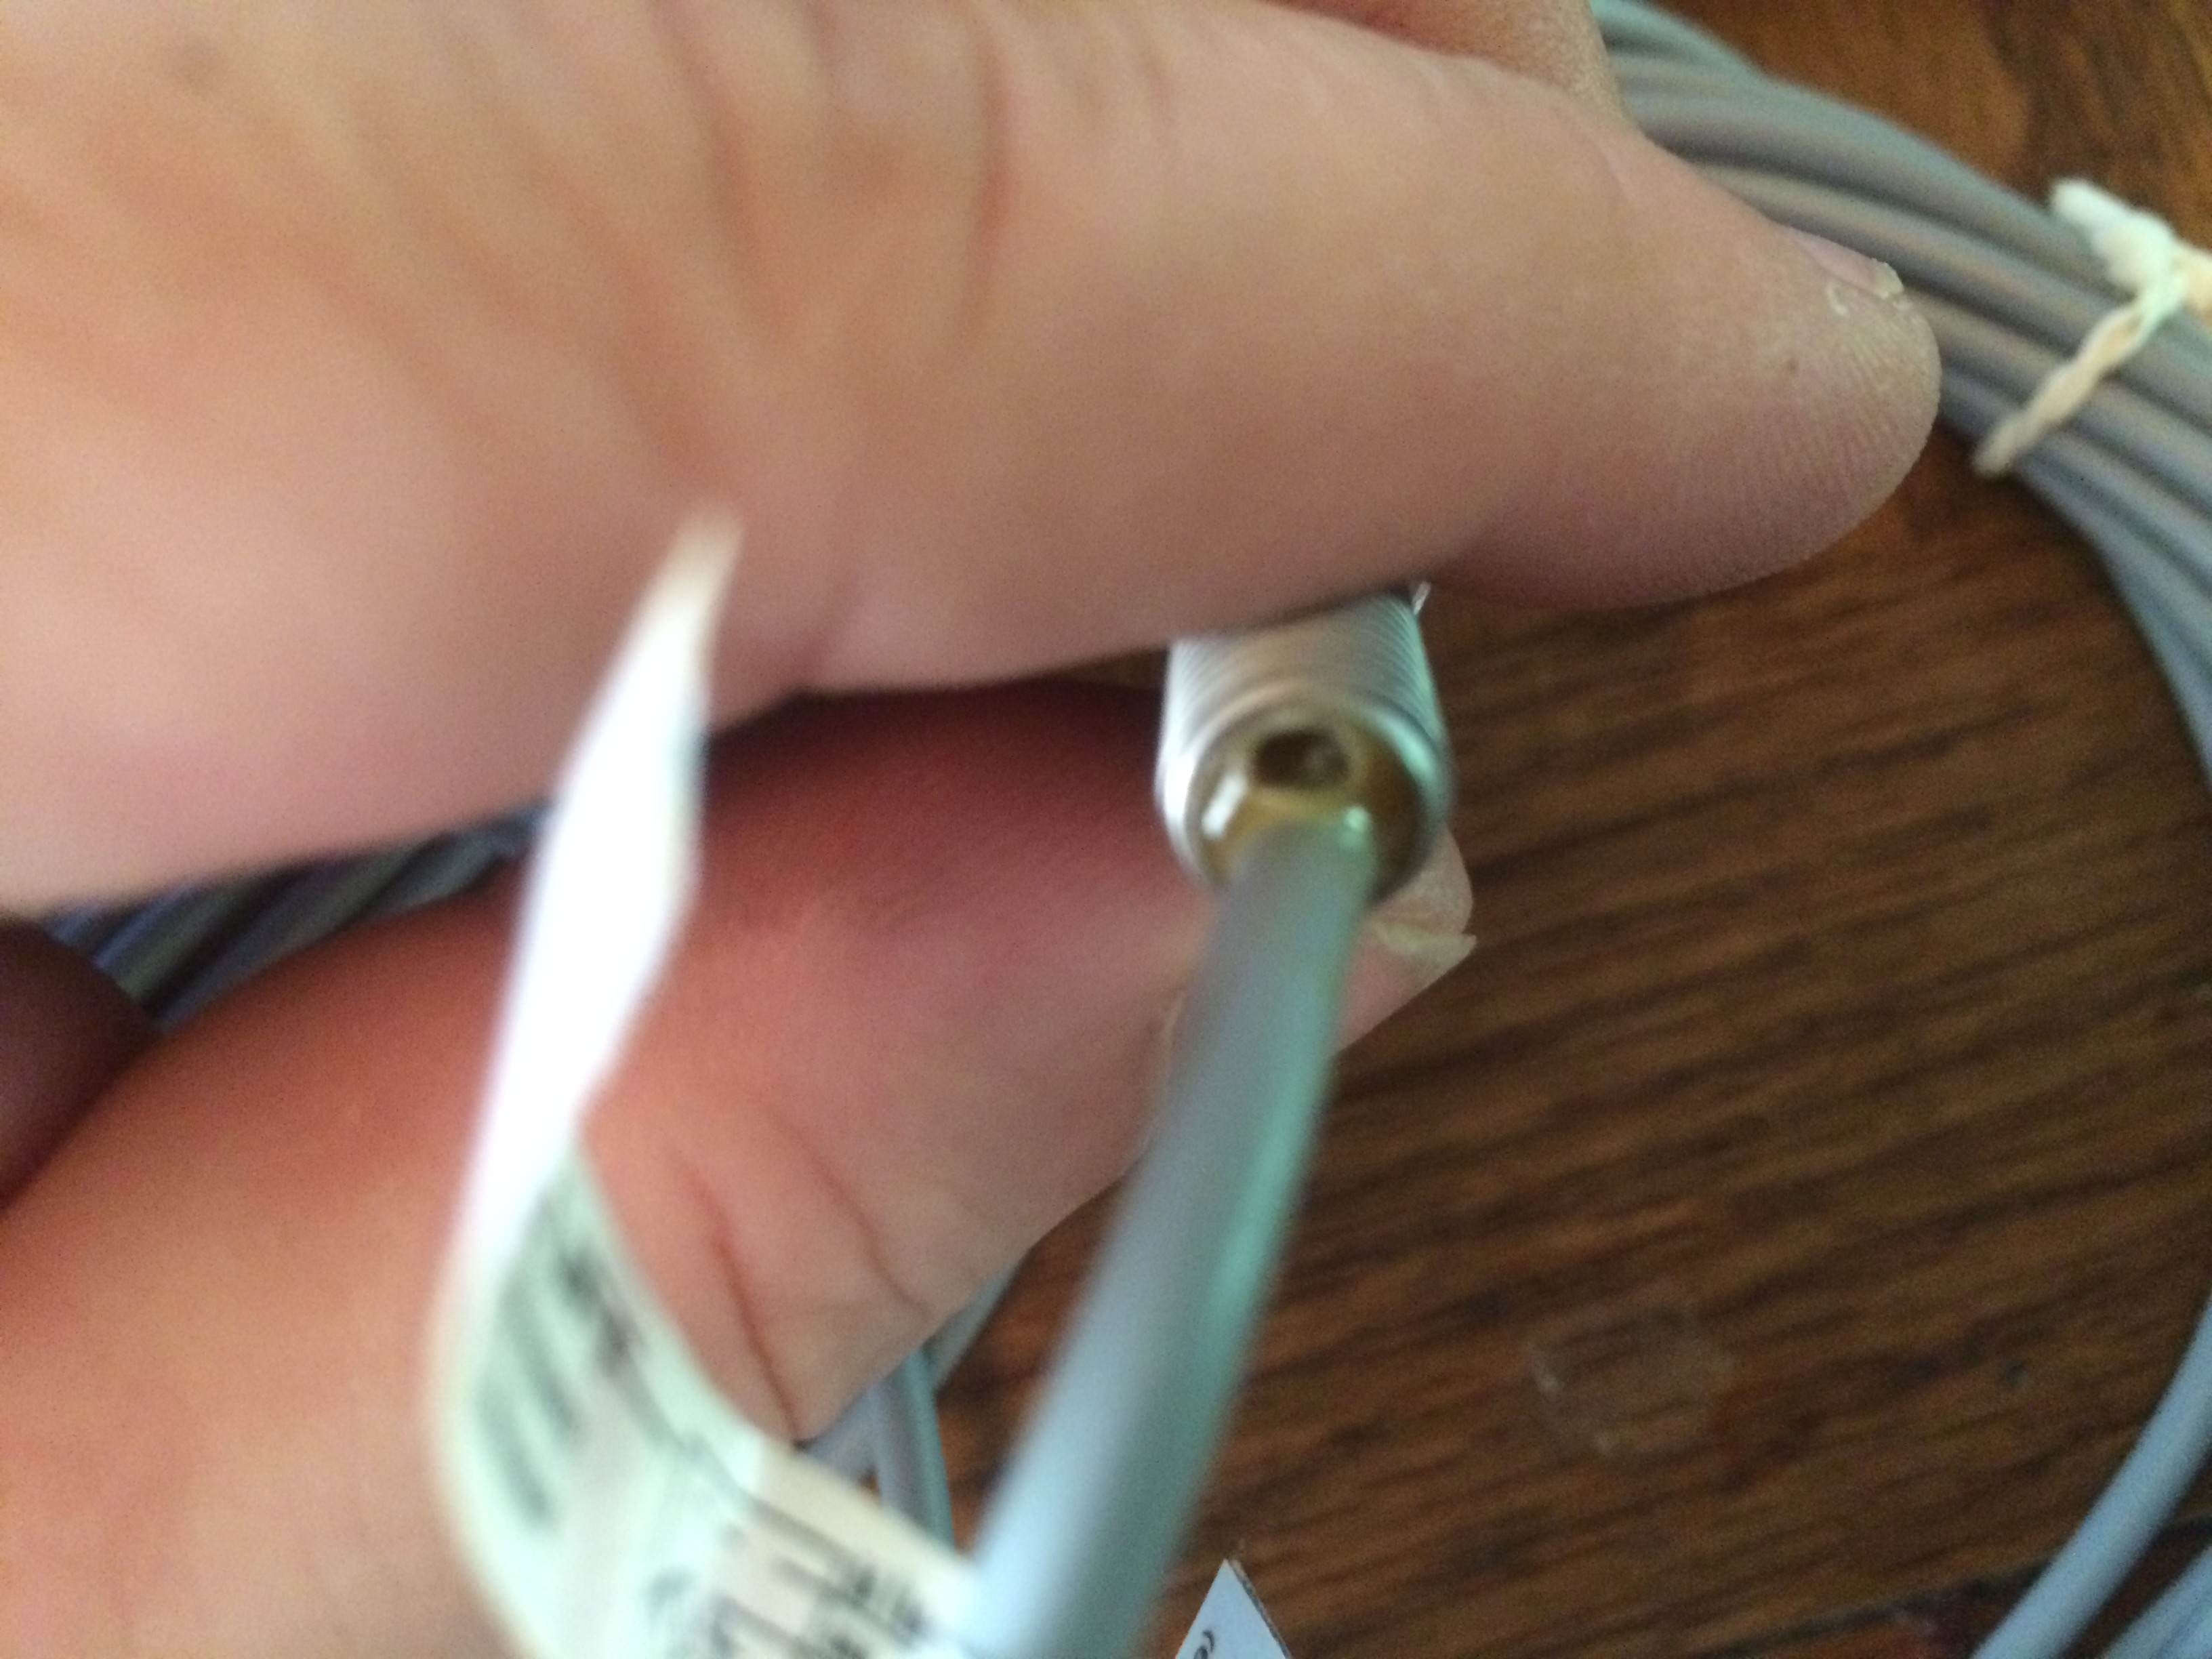
Should be able to adjust the limit and Home Position of the X Axis better then the manual switch.
Went to another version and with a Tormach Slant Pro Lathe Controller and path pilot 2.0 Here.
Last Updated on March 10, 2021 by Steven Rhine